Routing & CRM steps
Routing & CRM steps assign conversations, update tags and status, write contact data, set flow variables, and add internal notes for agents.
Live URL: live.chatmaven.ai/workspaces/flows
Assign To
Route the conversation to a team member.
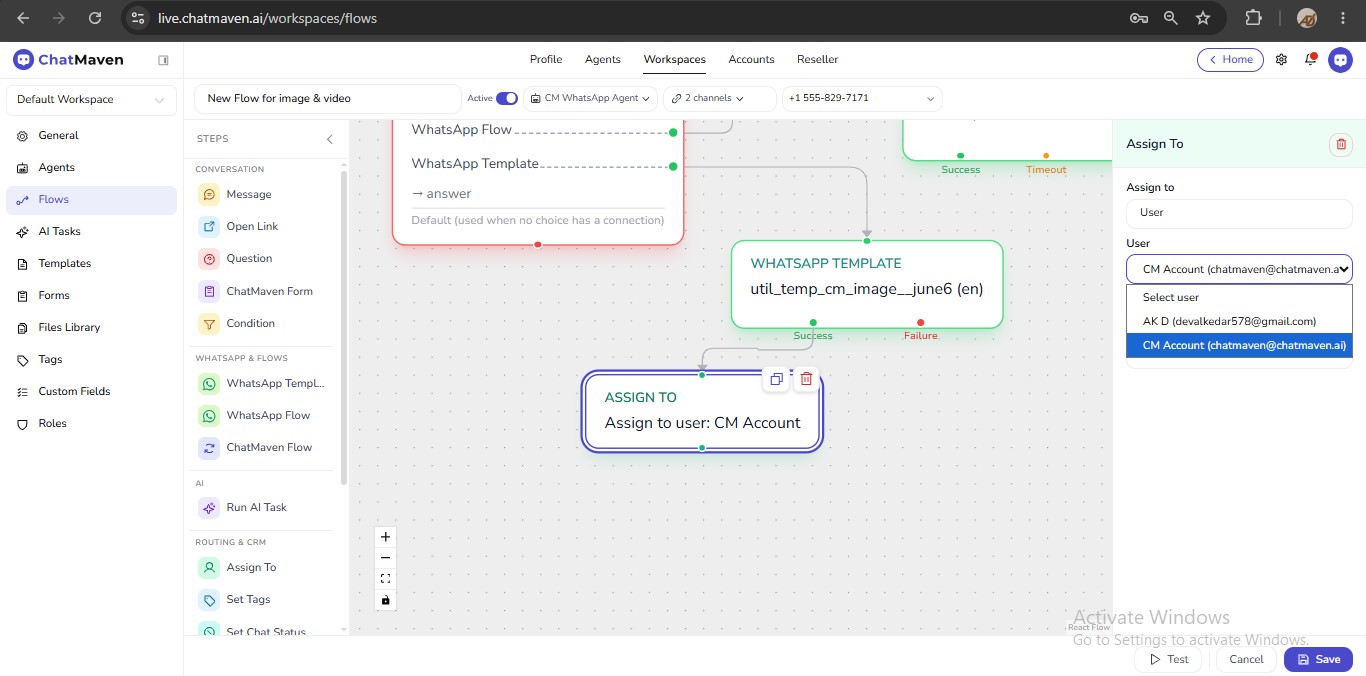
- Add Assign To from STEPS under Routing & CRM.
- Click the node and select the target user or assignment rule shown in your workspace.
- Save the step.
Tips:
- Combine with Set Tags or Add Note to give agents context.
- Scope the parent flow to the right agents so assignment options are valid.
Set Tags
Add or remove workspace tags on the contact or conversation.
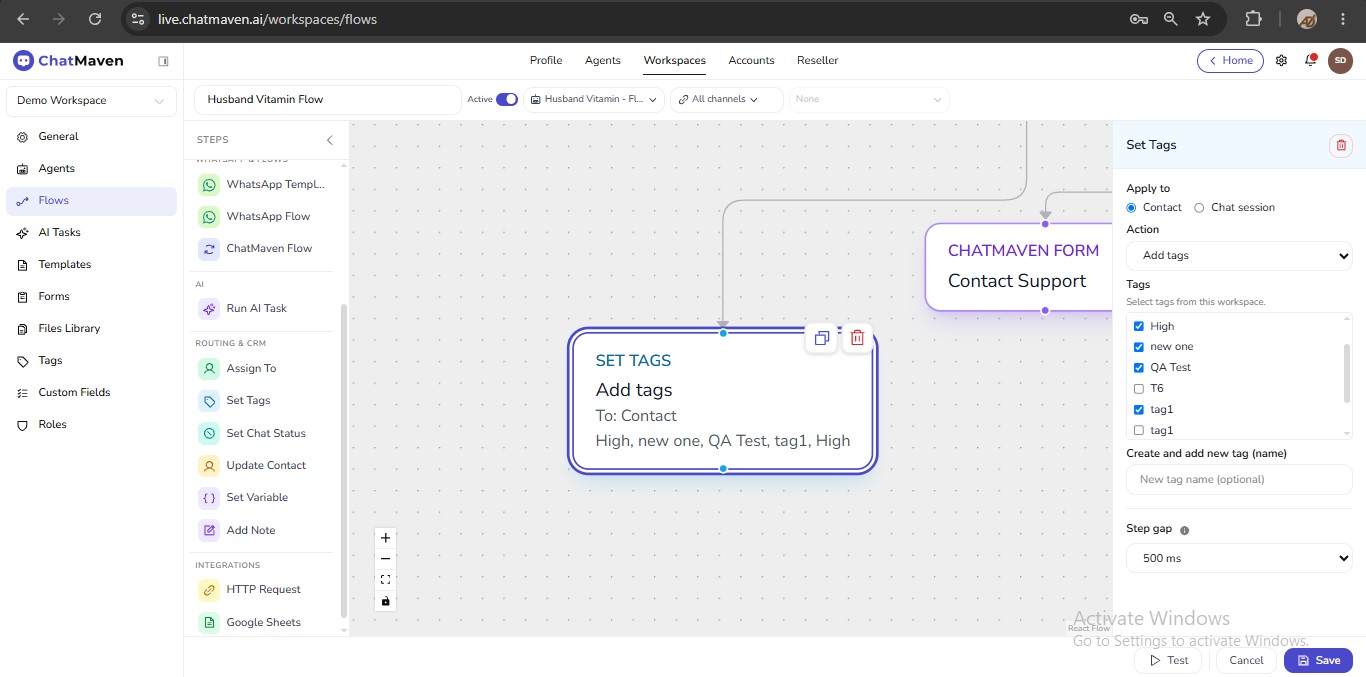
- Add Set Tags from STEPS under Routing & CRM.
- Select tags to add or remove in the right panel.
- Save the step.
Tips:
- Use before Condition when routing depends on tags.
- Keep tag names consistent across flows.
Set Chat Status
Update conversation status (for example open, pending, resolved) per your Inbox setup.
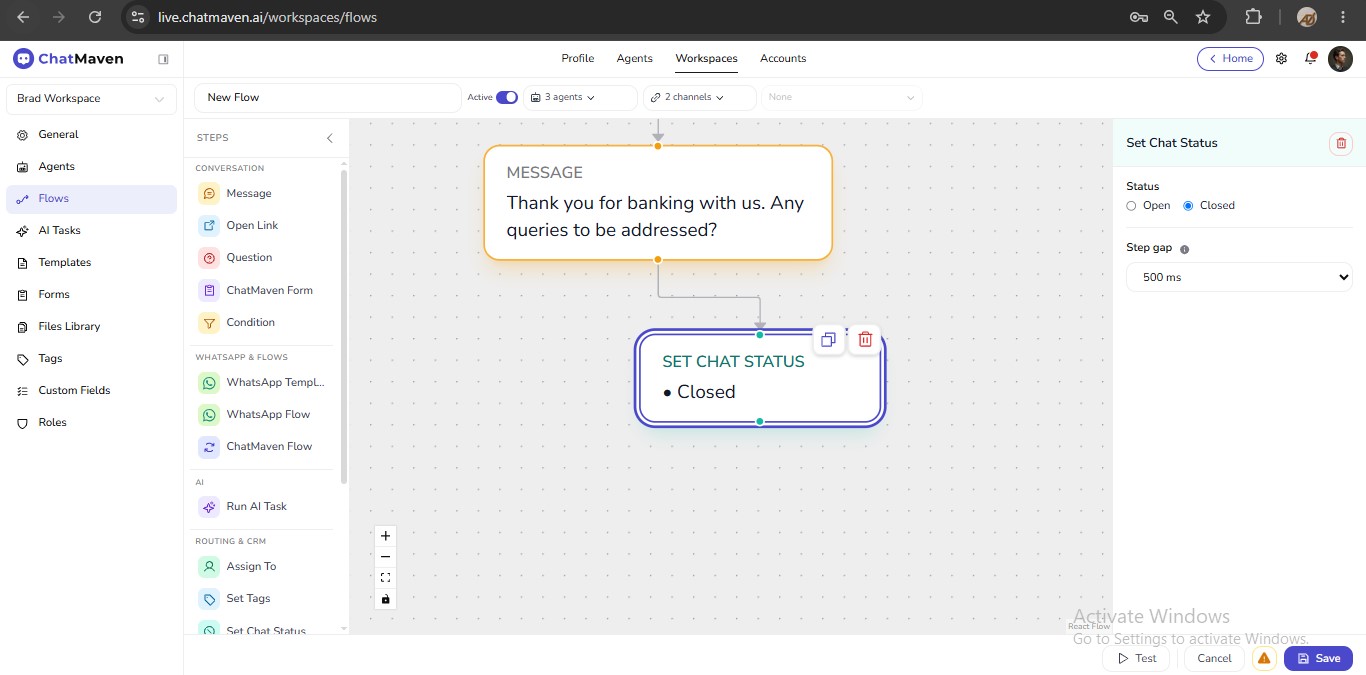
- Add Set Chat Status from STEPS under Routing & CRM.
- Select the status in the right panel.
- Save the step.
Tips:
- Place after the contact completes self-service if agents should pick up resolved threads.
- See Inbox for how status appears to agents.
Update Contact
Write values to custom contact fields.
- Add Update Contact from STEPS under Routing & CRM.
- Click the node and map field keys to values (static text or
{{variables}}). - Save the step.
Configuration:
- Field key — defined under workspace Custom Fields
- Value — static or variable from Question, ChatMaven Form, or HTTP Request
Tips:
- Create keys in Custom Fields before mapping in the flow.
- Match field type to the data you collect in Question or ChatMaven Form steps.
- You can map form fields directly on the ChatMaven Form step to skip a separate Update Contact when everything is mapped there.
Set Variable
Store a value for use in later steps.
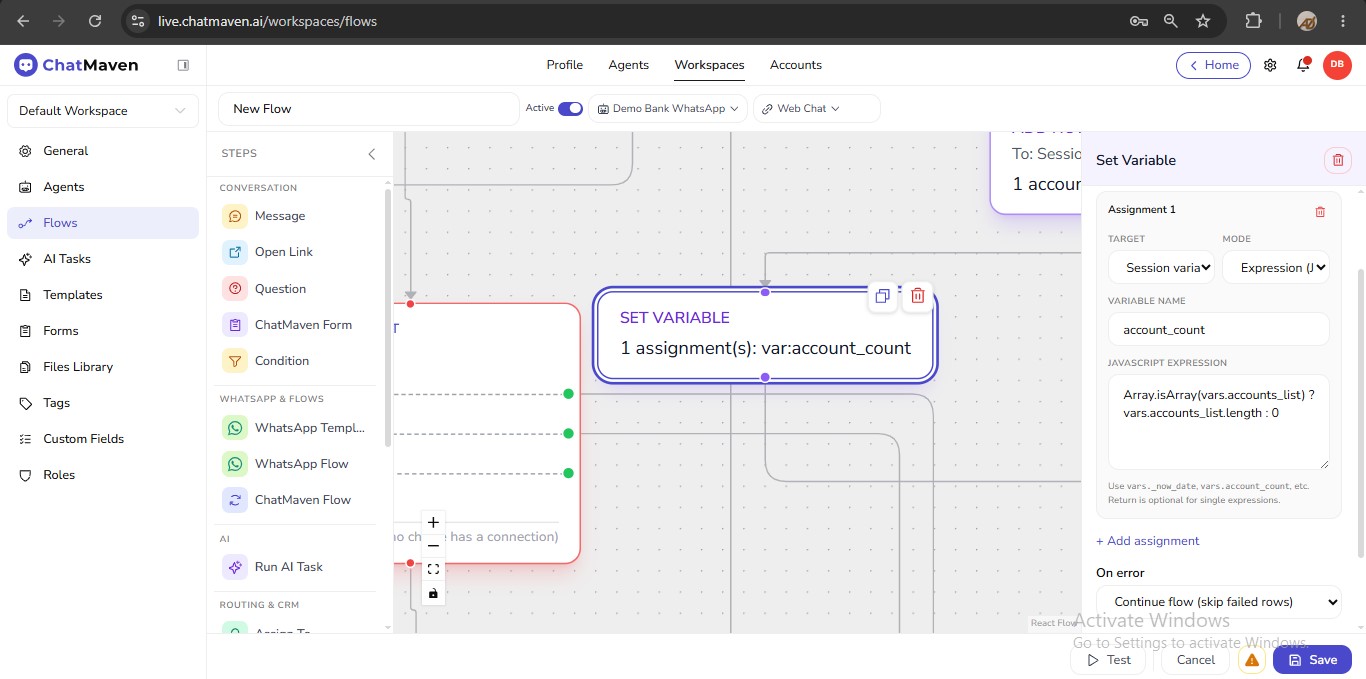
- Add Set Variable from STEPS under Routing & CRM.
- Enter the variable name and value (static text or reference to another variable).
- Save the step.
Tips:
- Use after HTTP Request if you map API fields in the HTTP step instead.
- Reference with
{{variableName}}in Message and Add Note steps.
Add Note
Create an internal note on the conversation. Agents see it in the Inbox—it is not sent to the contact as a chat message.
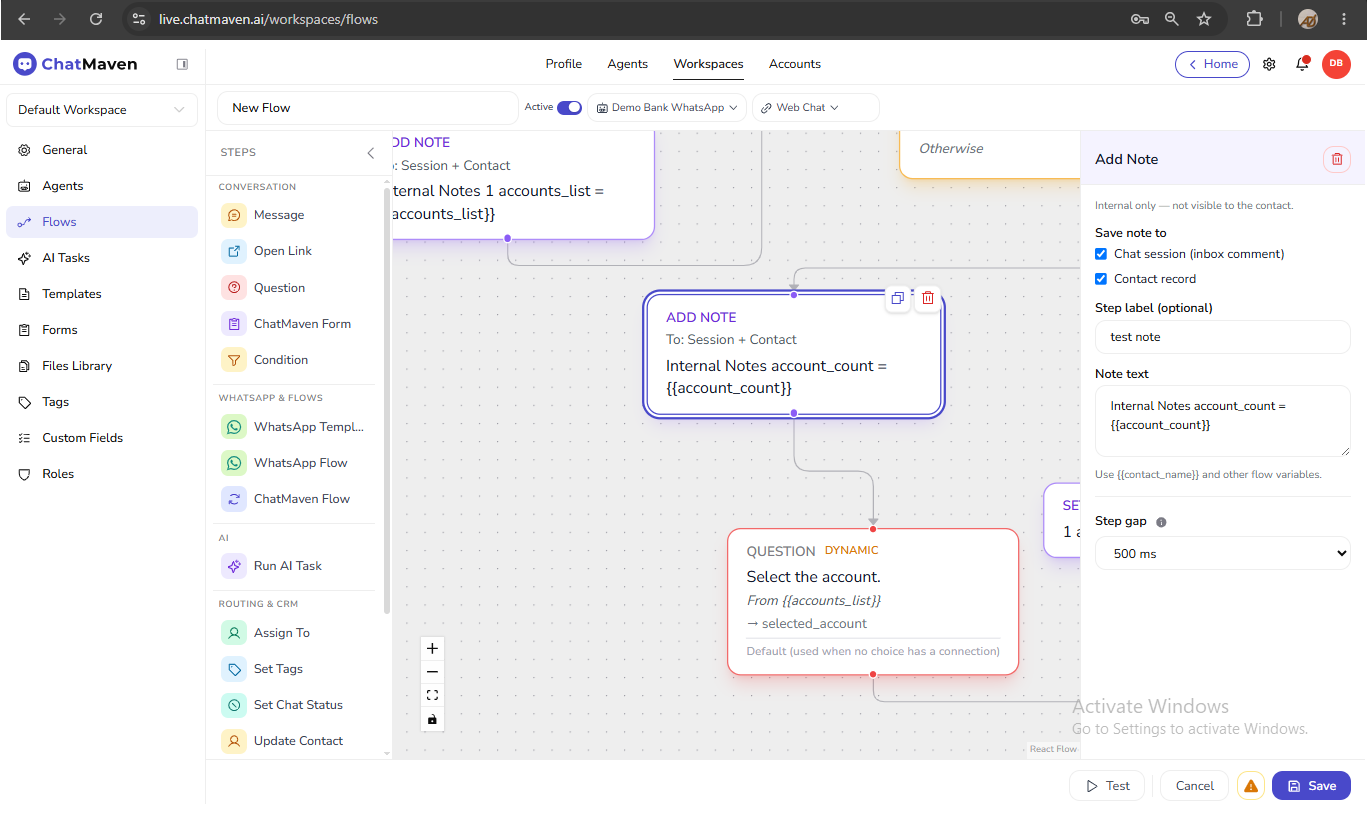
- Add Add Note from STEPS under Routing & CRM.
- Click the node and choose Save note to — Chat session (inbox comment) and/or Contact record.
- Enter note text. Insert variables with
{{variableName}}(for example{{main_menu}},{{answer}}). - Save the step, then Save the flow.
Tips:
- Keep notes concise and actionable.
- Do not put passwords, full API responses, or PCI data in notes.
- Add notes before Assign To when agents need context at pickup.
Add Note vs Message
Message goes to the contact. Add Note is for agents only.