Getting Started with Inbox
The Inbox is the central place where you can manage conversations with your contacts across all communication channels. This article explains how to navigate the Inbox and highlights its main features.
The Inbox consists of several important sections that work together to help you manage and respond to conversations efficiently.
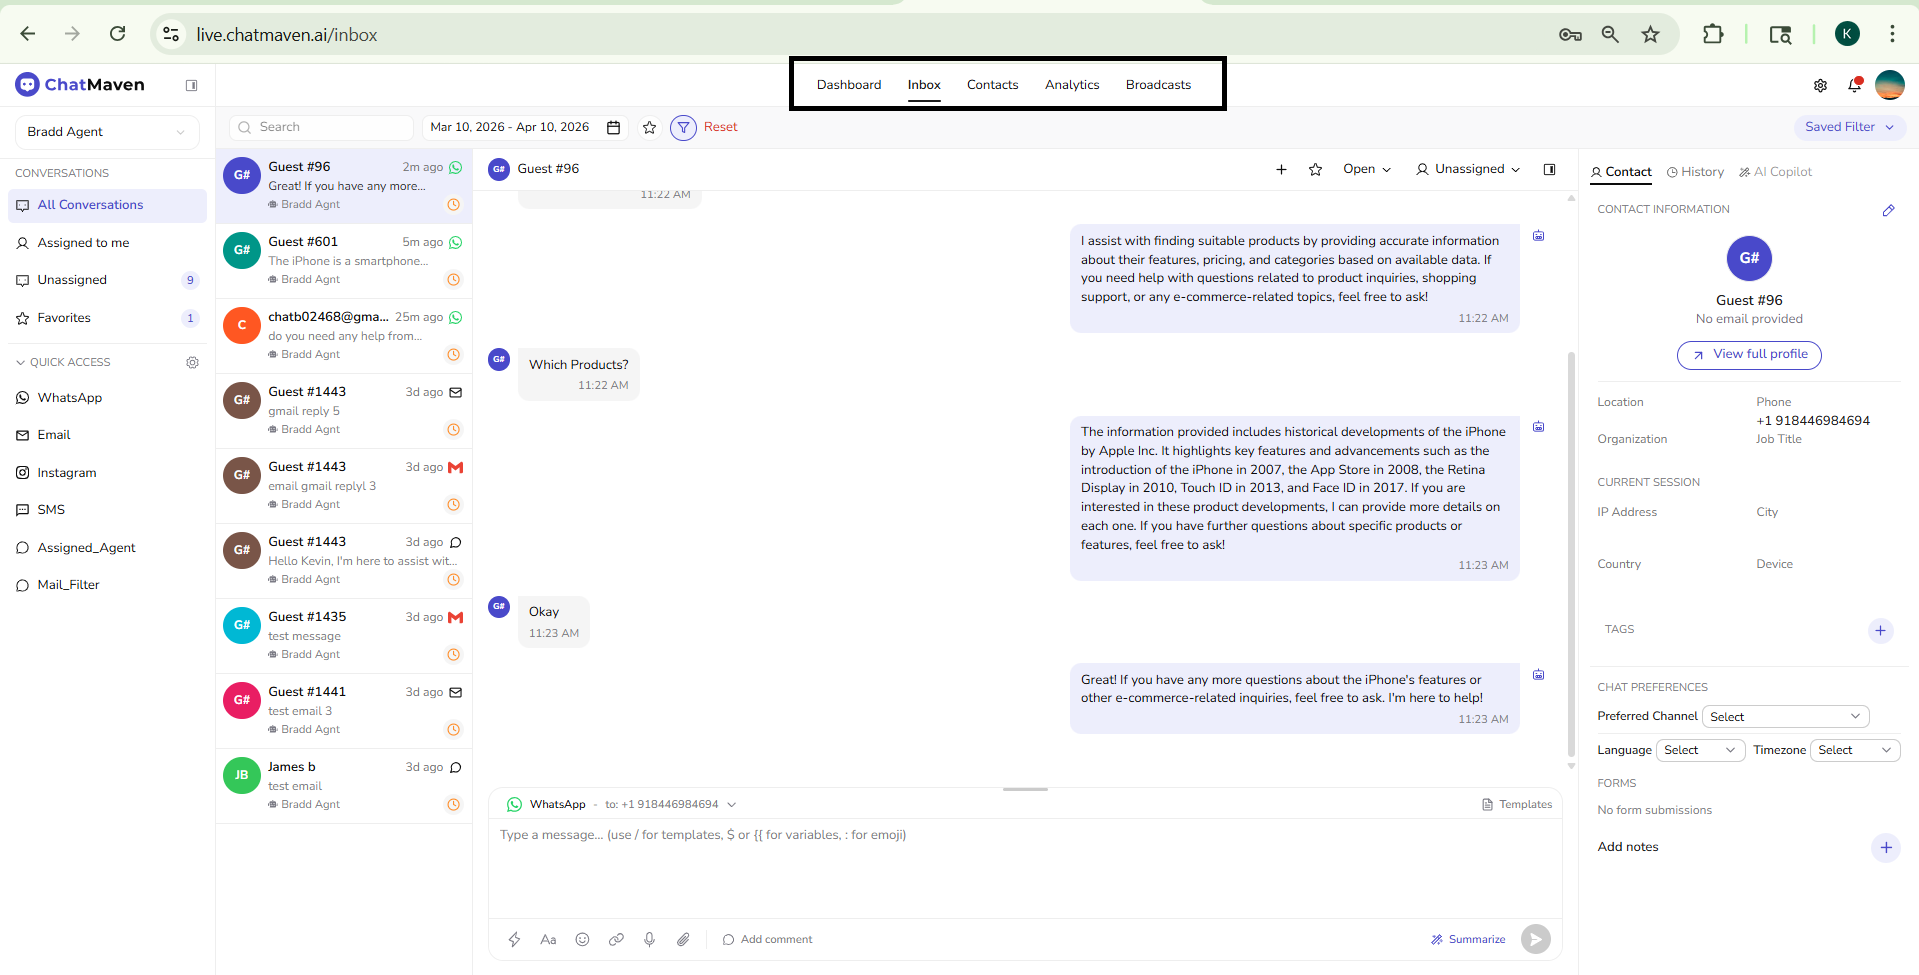
App navigation (top bar)
Across the top of ChatMaven, you can navigate between the main areas: Dashboard, Inbox, Contacts, Analytics, and Broadcasts. On the right, you will typically find notifications (bell), help (question mark), and/or settings (gear, depending on your workspace), along with your profile avatar or menu—consistent with the rest of the product.
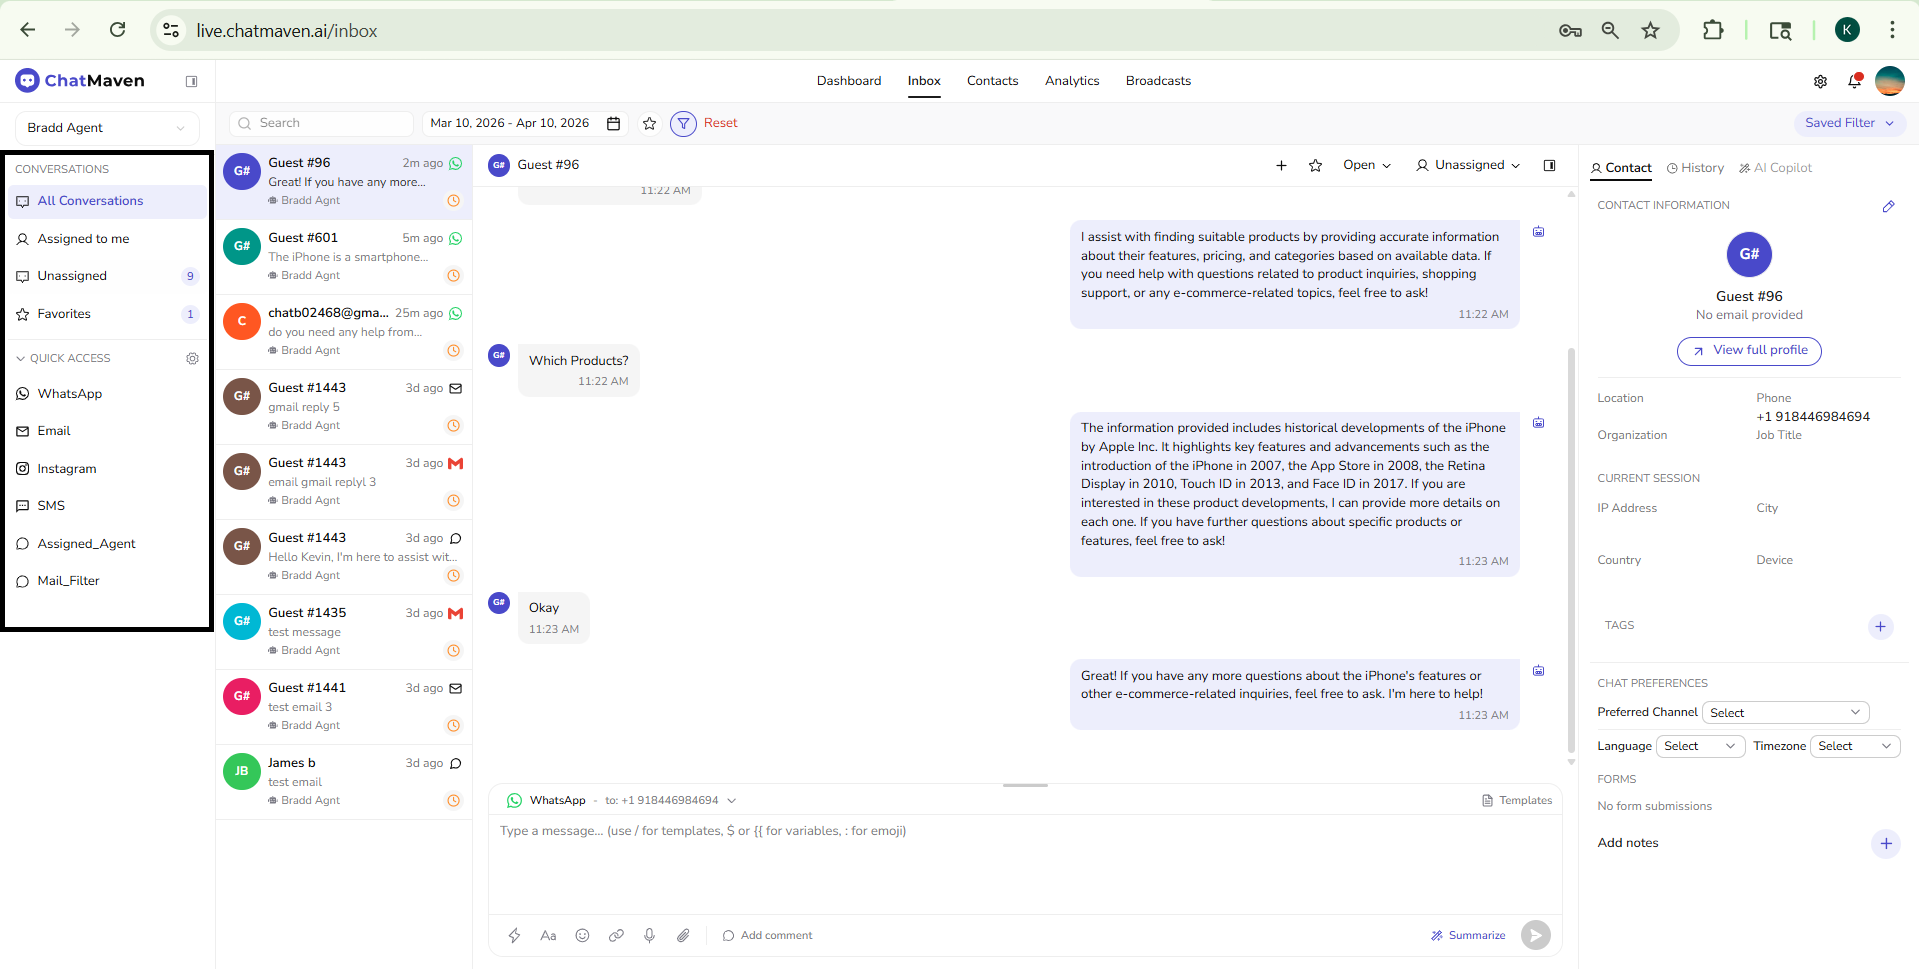
Side Panel
The side panel is where you select which agents’ conversations to load, open conversation view, and access Quick Access shortcuts. Search, date range, and advanced filters are located in the row above the conversation list (not within this narrow column).
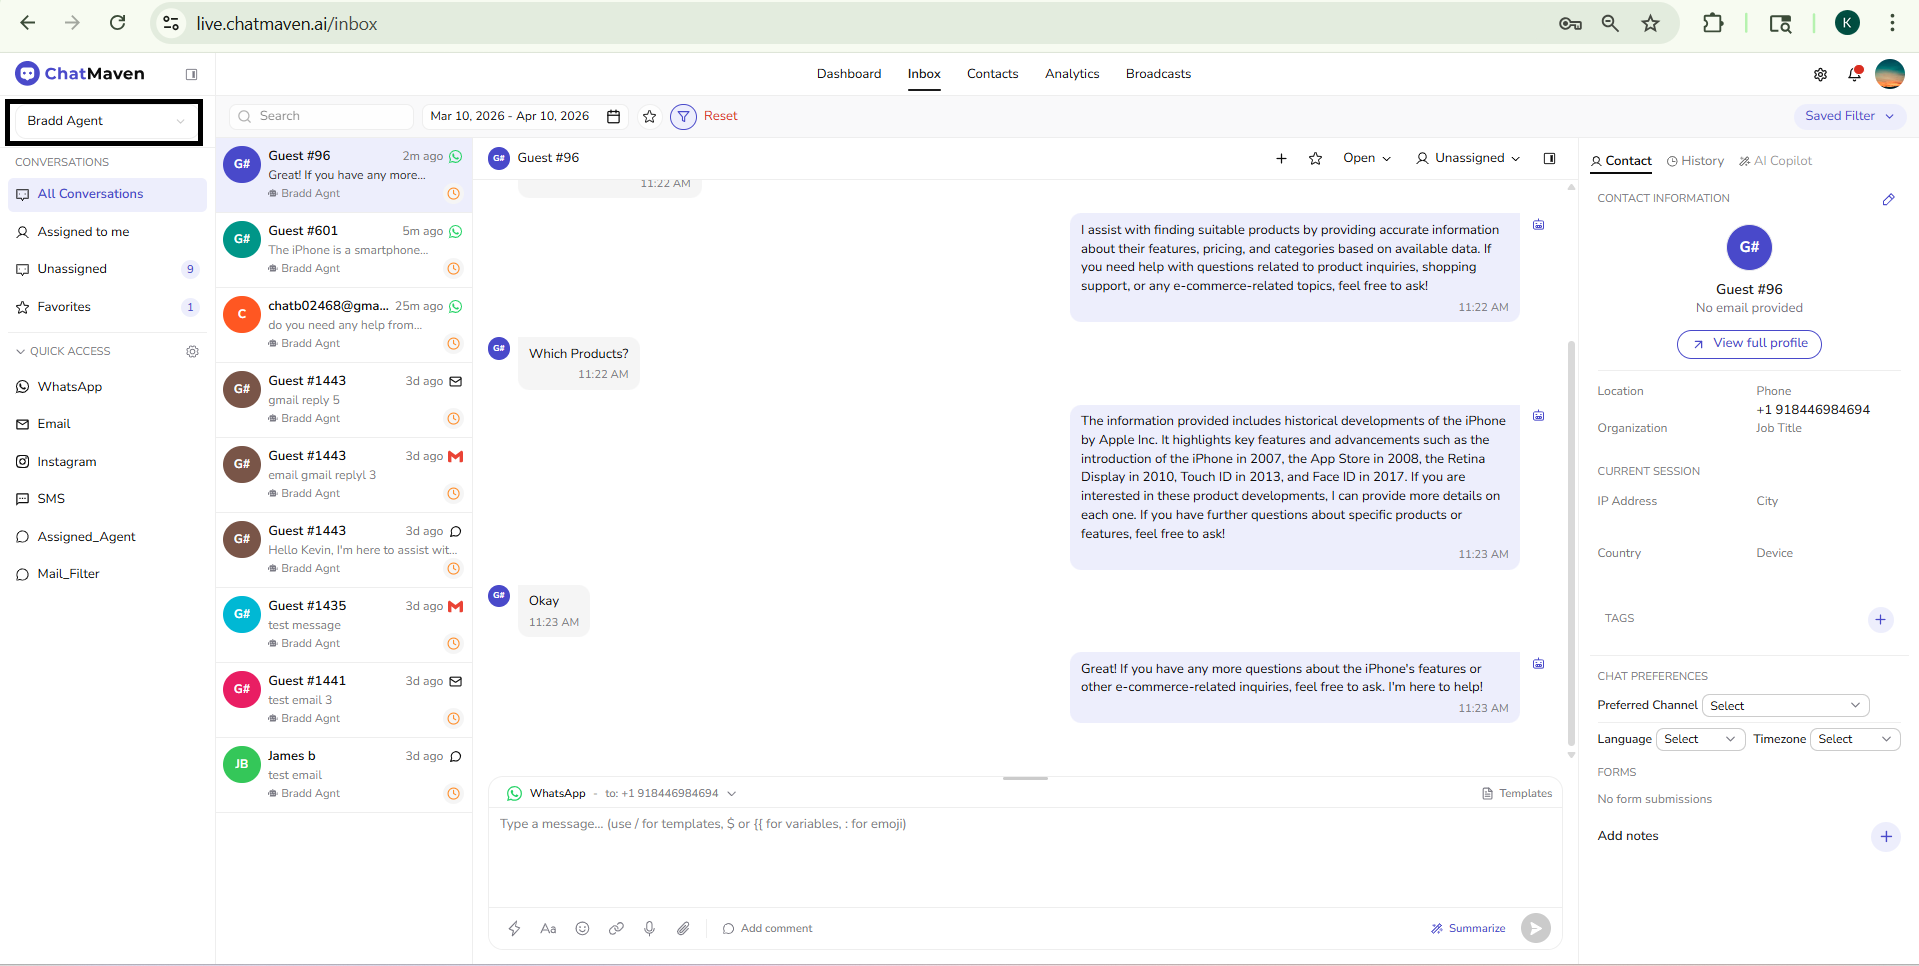
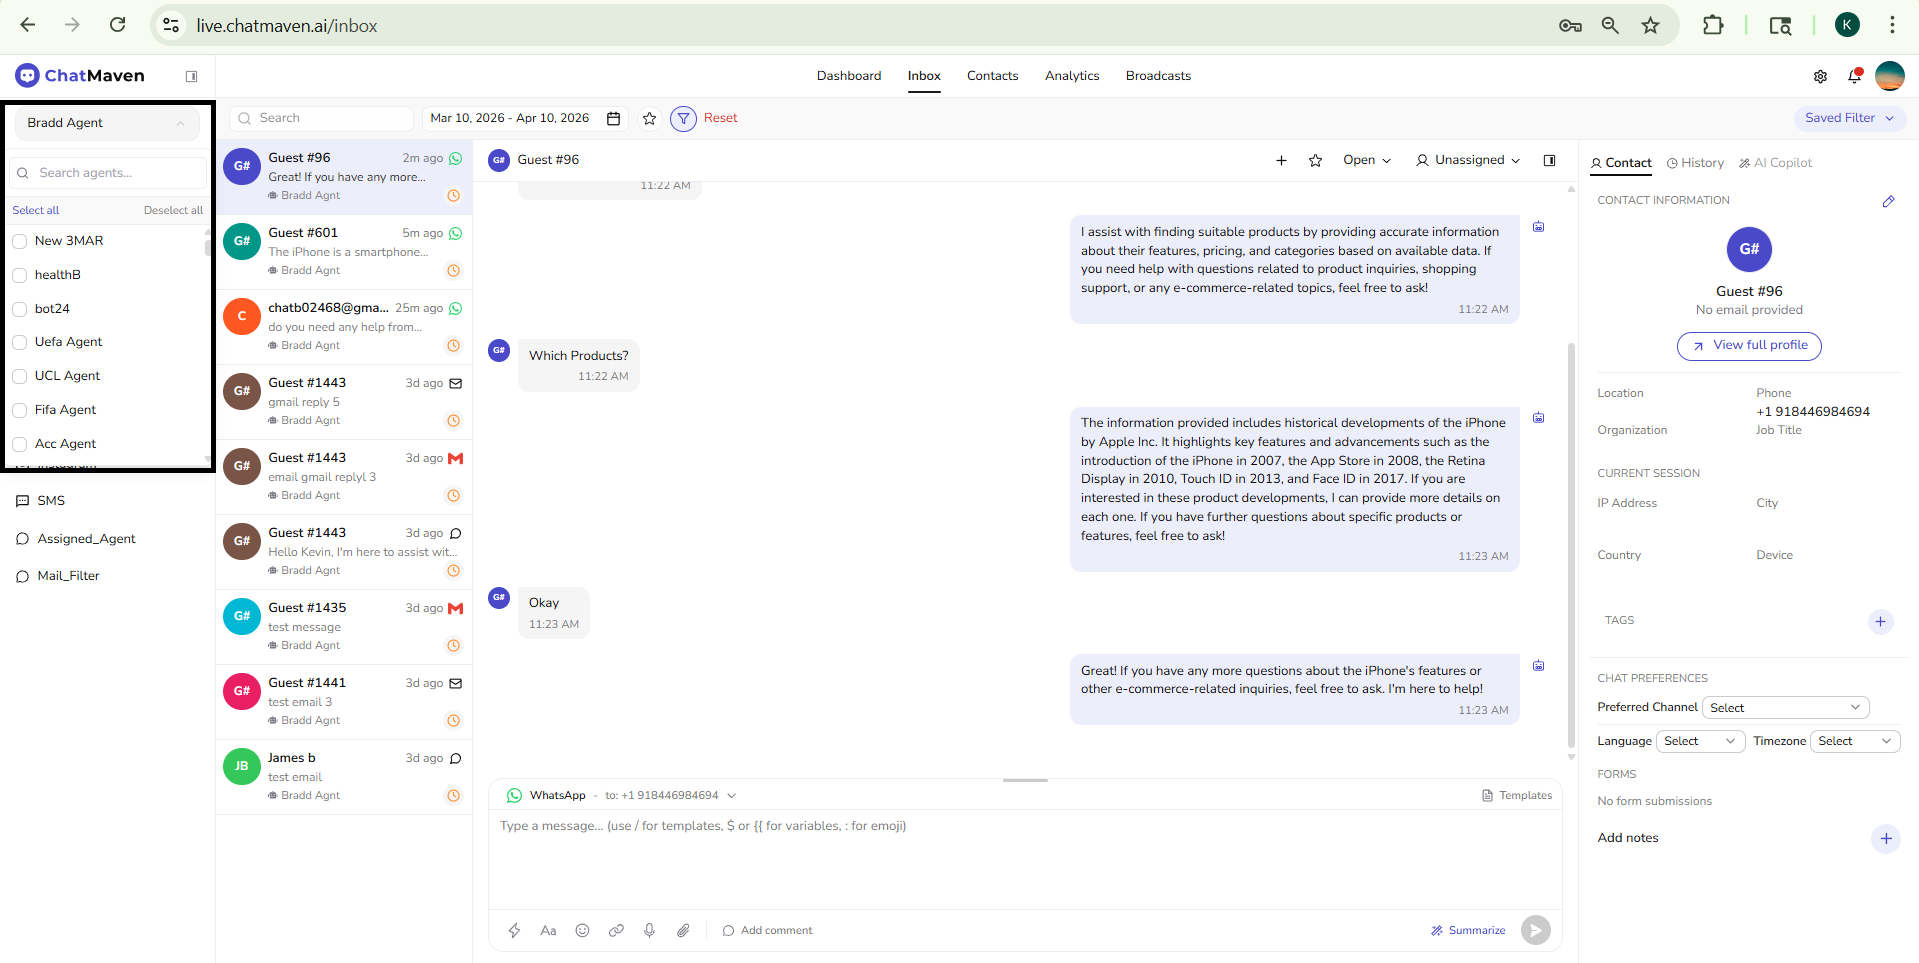
Agent selection
At the top of the side panel, an agent selector dropdown lets you choose which agent’s or agents’ conversations you see. It may show a single agent name, a bot label (e.g., Bot3), or a summary such as "93 agents selected" when many agents are included. The conversation list updates based on your selection.
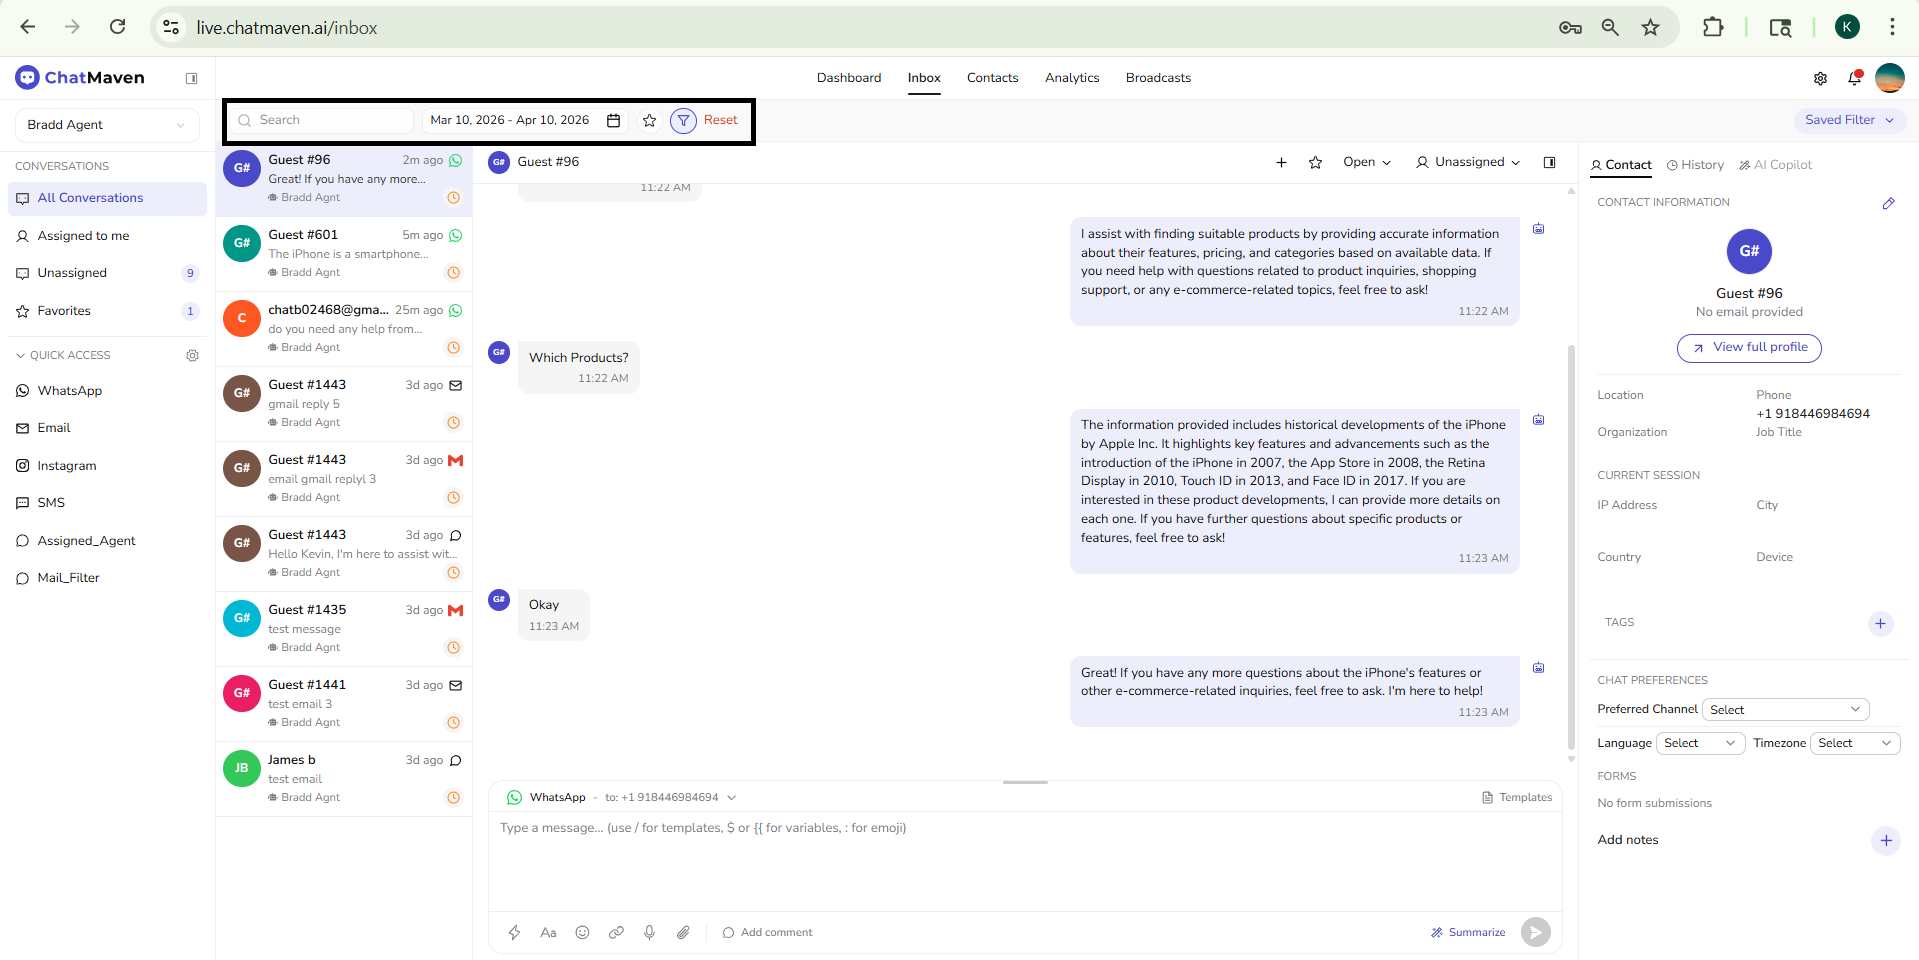
Search and Filters (Above the Conversation List)
Use the toolbar above the conversation list to find or filter conversations:
- Search: Find conversations or contacts by name or keyword.
- Date range: Limit the list to a chosen period (e.g., Mar 06, 2024 – Apr 06, 2024). A calendar control opens the date picker.
- Filter (funnel): Opens the Add to Filters panel for advanced, condition-based filters (see Filtering and Sorting).
- Favorites toggle (star), when shown: Quickly limits the list to favorited conversations.
- Reset: Clear the current filters and return to a broad view.
- Saved Filter: Opens the dropdown to search, apply, or manage saved filter sets.
Conversations
Under CONVERSATIONS, you can switch between these views:
- All Conversations: Shows all conversations. The count (e.g., 12) appears next to the label.
- Assigned to me: Shows only the conversations assigned to you.
- Unassigned: Shows conversations that haven't been assigned. The count (e.g., 10) appears next to the label.
- Favorites: Shows conversations you've marked as favorites. The count (e.g., 1) appears next to the label.
The count next to each option indicates how many conversations match that view and updates as new messages arrive.
Quick Access
The Quick Access section (with a gear icon for settings) provides shortcuts to saved or pinned views—often channels or custom filters set up in your workspace. Examples include:
- WhatsApp, Email, Instagram, SMS
- Assigned_Agent, Mail_Filter, or other named shortcuts
Use these to quickly jump to a channel-focused list or a predefined filter without rebuilding it each time.
Conversation list
The conversation list shows all conversations with your contacts. What appears depends on the agent selector, the CONVERSATIONS view (All, Assigned to me, and so on), and the toolbar filters (search, date range, saved filters, and so on).
Each row represents a single conversation and includes:
- Avatar: Contact initials (e.g., G#, NG, KS).
- Contact name: For example, Guest #1435, or the contact's full name.
- Last message: A short preview of the latest message (or No message yet if none).
- Routing / ownership: Shows a bot or agent label (e.g., robot icon and Bot3), or the assigned teammate’s name (e.g., Bradd Agent) when a human owns the conversation.
- Timestamp: When the last activity occurred (e.g., "2h ago", "6d ago").
- Channel icon: Indicates the channel (e.g., D for direct/web chat or M for email).
- Status icon: Indicates whether the conversation is pending, snoozed, or active (style may vary).
The selected conversation is highlighted (e.g., in purple). Click a row to open it in the main view.
Main conversation view
The main conversation view is the central area where you read the thread and reply. It is made up of three parts: the conversation header, the chat history, and the message composer.
Conversation header
At the top of the thread you see:
- Contact name and avatar (e.g., Guest #1435 with "G#").
- Add (+): Opens Add Chat Tag so you can label the conversation (for example high or low); enter the tag name and confirm Add Tag.
- Favorite (star): Mark the conversation as a favorite (it appears under Favorites in the side panel).
- Open, Closed, or Unassigned — Status dropdown for the conversation lifecycle.
- Unassigned (or an assignee name): Assignment dropdown so you can assign the conversation to yourself or a teammate.
- Sidebar toggle: Show or hide the right-hand Contact / History / AI Copilot column to give the thread more space.
Use the assignment dropdown so your team knows who is handling the thread. Use the status dropdown for Open, Closed, or Unassigned (session status). For details, see Assigning and closing a conversation.
Chat history
Messages appear in chronological order with:
- Timestamp (e.g. 02:10 PM or Mar 1, 2026 10:32 PM).
- Sender: For example, AI with an AI icon for bot messages. Bot messages can show a source (e.g. "Source: Facility knowledge base").
- Delivery status (channel-dependent): Outgoing messages may show icons or labels for sent, delivered, or read when the channel supports it (for example some chat or email providers).
Scroll up to see older messages.
Message composer
At the bottom you compose and send messages:
- Channel selector: Dropdown to choose how the message is sent. Depending on your integrations, options can include Web Chat, Email SMTP, Google Gmail, WhatsApp, Instagram, and similar.
- Email fields (when an email channel is selected): Subject (e.g. default text such as “New message from ChatMaven”), plus CC and BCC to include additional recipients.
- Text area: Type your message. The placeholder reminds you:
/for templates,$or{{for variables,:for emoji. - Templates: Opens a panel titled for the current channel (e.g. Templates – Email SMTP) with Search templates…, a list of templates, and Refresh to reload the list.
- Toolbar: Typically includes rich text and insert tools—for example Aa (text size / styles), Bold, Italic, link, attachment, emoji—plus Add comment for internal notes, AI Enhance (magic wand) where enabled, and other shortcuts your workspace provides (e.g. voice or scheduling icons).
- Summarize: Short summary of the conversation (also available in AI Copilot).
- Send: Send the message (paper plane / arrow icon).
Vertical sidebar
The vertical sidebar is the rightmost column of the Inbox. It has three tabs:
Contact tab
In the Contact tab, you can access and edit key information about the selected contact:
- Profile header: Contact avatar, name, and email (or No email provided for guests) with a View full profile button. Use the edit icon (pencil) in the section header to update contact details.
- Contact information: Business/profile fields such as Role, Experience, Location, Phone, Organization, and Job Title (fields shown may vary by your workspace setup).
- Current session: Session context like IP address, City, Country, and Device (for example Desktop).
- Tags: Add or manage tags from the plus icon in the Tags section.
- Chat preferences: Set Preferred Channel, Language, and Timezone using the dropdown selectors.
- Forms: View submitted forms linked to the contact (for example admission/support forms) with submission date and related values. If none exist, you may see No form submissions.
- Add notes: Section with a + control to add internal notes visible only to your team, not to the contact.
Internal notes are for your team only. Use them for handoff notes or reminders.
History tab
In the History tab, you can see past activity and conversation history for the selected contact. This helps you review what happened over time without leaving the Inbox.
AI Copilot tab
The AI Copilot tab provides AI assistance in the context of the current conversation: Suggest Response (draft a reply from the thread), Summarize Conversation (short overview of the thread), and Ask Knowledge Base (questions against your agent’s internal knowledge).
Ask Knowledge Base draws on files and sources you add under Agents → Knowledge Base using the Internal KB only tab; after they finish processing, open Inbox → AI Copilot, enter a question related to that content, and click Ask to generate an answer you can copy into your reply. For setup, step-by-step use, limits, and troubleshooting, see AI Copilot in the Inbox and Knowledge Base.
Next steps
You've learned how to navigate the Inbox and understand its key features. Continue with:
- Assigning and closing a conversation — Assign, unassign, and close conversations from the header.
- AI Copilot in the Inbox — Draft replies, summaries, and Ask Knowledge Base (internal KB files, then Ask in Inbox).
- Filtering and Sorting Conversations in Inbox — Use search, date range, favorites, saved filters, and advanced filter logic.
- Data Sources Overview — Feed your chatbot with information.
- Chatbot Settings — Configure your bot's behavior.
- Integrations Overview — Connect channels and tools.
FAQ and troubleshooting
I do not see the Inbox.
Your role may exclude inbox access, or you need to pick the correct workspace. Ask an admin to add you to the routing group.
Conversations are not assigned to me.
Check assignment rules, teams, and your availability. Unassigned queues may need manual claim.
Notifications are noisy or silent.
Open Notification settings and align sound, desktop, and email with how you triage.