Creating an AI agent
AI agent creation video
Watch the walkthrough video:
If the embedded player does not load, open it directly here: AI agent creation video.
When you create a new AI agent in ChatMaven, a wizard walks you through four steps: Templates, AI Config, Knowledge Base, and Integrations. The left sidebar shows your progress; use Next and Back at the bottom to move between steps. You can close the wizard with X in the top-right corner when it appears.
This page describes each step and the fields you will see in the product.
Where the wizard appears
Start agent creation from your ChatMaven dashboard (for example live.chatmaven.ai/dashboard) when you add a new agent. The same stepper appears in the left sidebar while you work through setup.
Sidebar during setup
The vertical stepper shows:
| Step | Label | Purpose |
|---|---|---|
| 1 | Templates | Choose template |
| 2 | AI Config | Configure AI |
| 3 | Knowledge Base | Add knowledge |
| 4 | Integrations | Connect apps |
Below the steps, SPOTLIGHT may list shortcuts such as Web Chat and WhatsApp for channel-specific work after the agent exists.
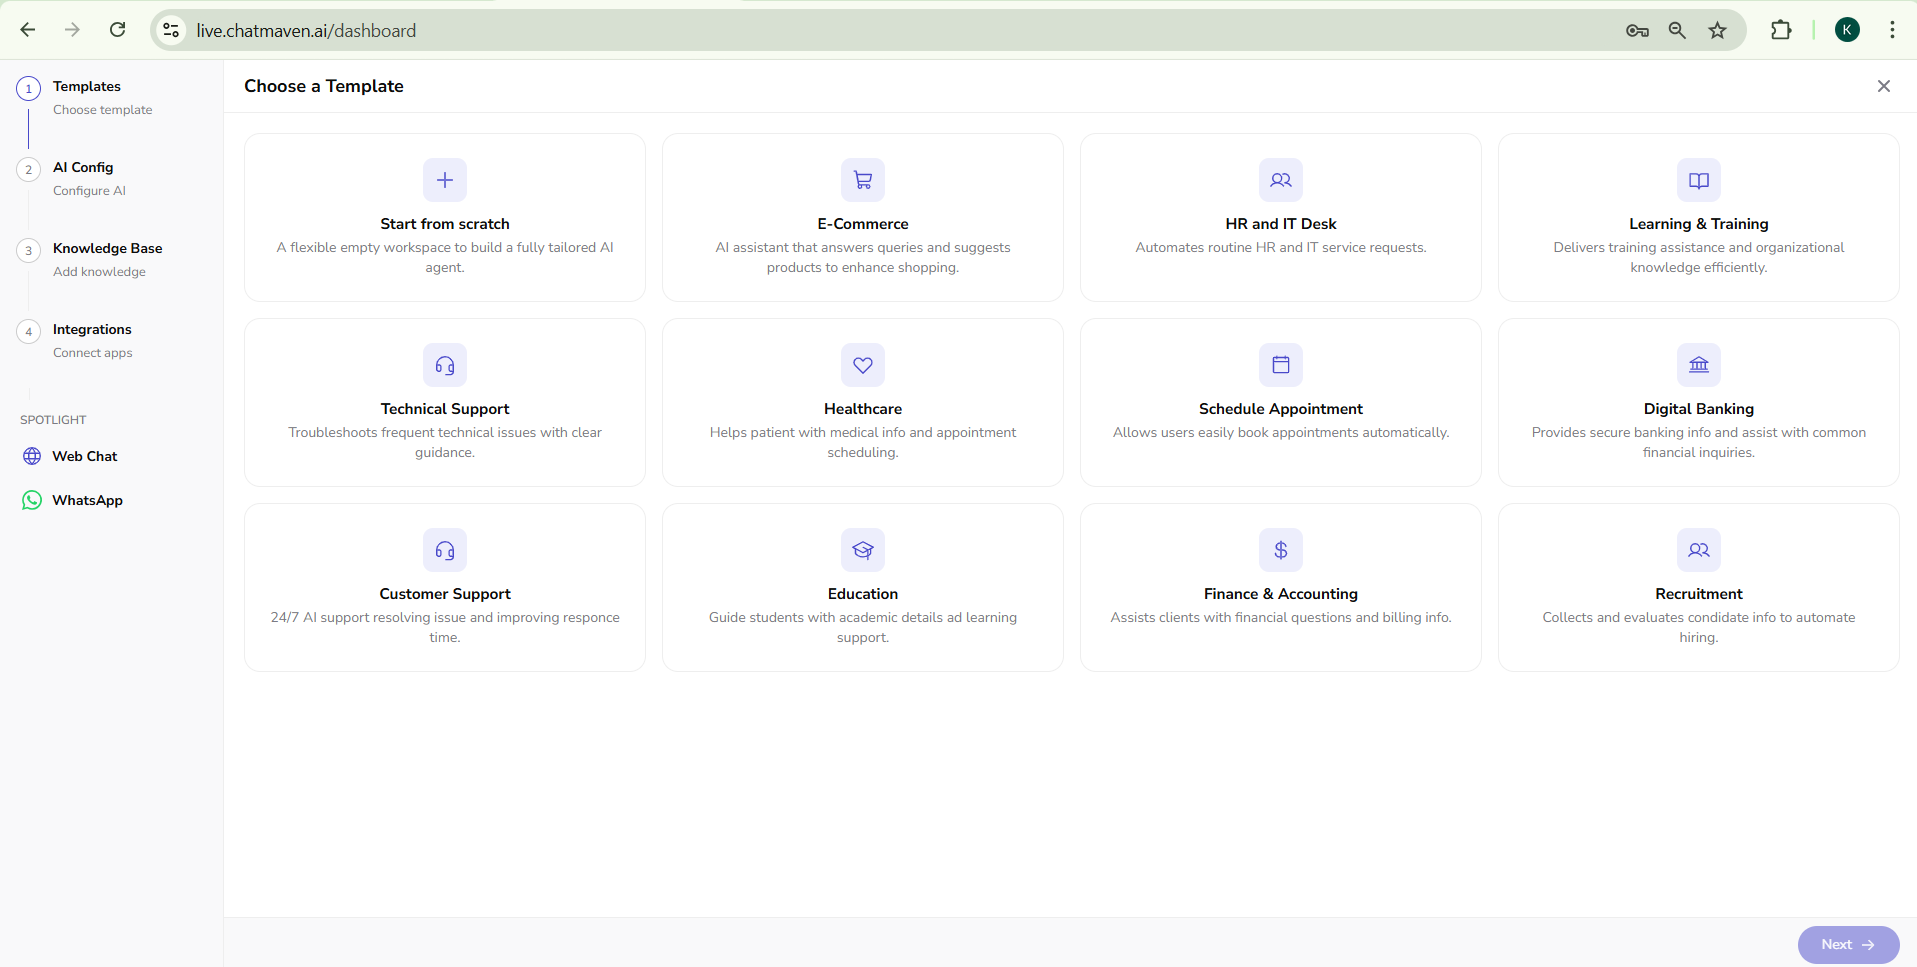
Step 1: Choose a Template
The main area is titled Choose a Template. You pick one starter card; each card has an icon, a title, and a short description.
Available templates include:
- Start from scratch — A flexible empty workspace to build a fully tailored AI agent.
- E-Commerce — Answers queries and suggests products to enhance shopping.
- HR and IT Desk — Automates routine HR and IT service requests.
- Learning & Training — Delivers training assistance and organizational knowledge.
- Technical Support — Troubleshoots frequent technical issues with clear guidance.
- Healthcare — Helps patients with medical info and appointment scheduling.
- Schedule Appointment — Lets users book appointments easily.
- Digital Banking — Provides secure banking info and common financial inquiries.
- Customer Support — 24/7 AI support for issues and faster responses.
- Education — Guides students with academic details and learning support.
- Finance & Accounting — Assists with financial questions and billing info.
- Recruitment — Collects and evaluates candidate info to automate hiring.
After you select a template, click Next → in the bottom-right to continue.
Step 2: AI Config — Basic Settings
This step is labeled AI Config in the sidebar. The main panel title is Basic Settings.
Identity
- Select Workspace — Dropdown to choose which workspace owns the agent (for example your team workspace).
- Agent Name — The display name for the agent (placeholder example: Support Bot).
- Role Title — How the agent presents its role (placeholder example: Customer Support Agent).
AI model
- Select AI Model — Dropdown to choose the underlying model (for example GPT-4.1).
Style & tone
- Tone — Toggle buttons for how the agent sounds. Options typically include Professional, Friendly, Casual, and Formal. One tone is active at a time.
- Creativity — A slider from Precise (left) to Imaginative (right). Higher values allow more varied wording; lower values favor consistency.
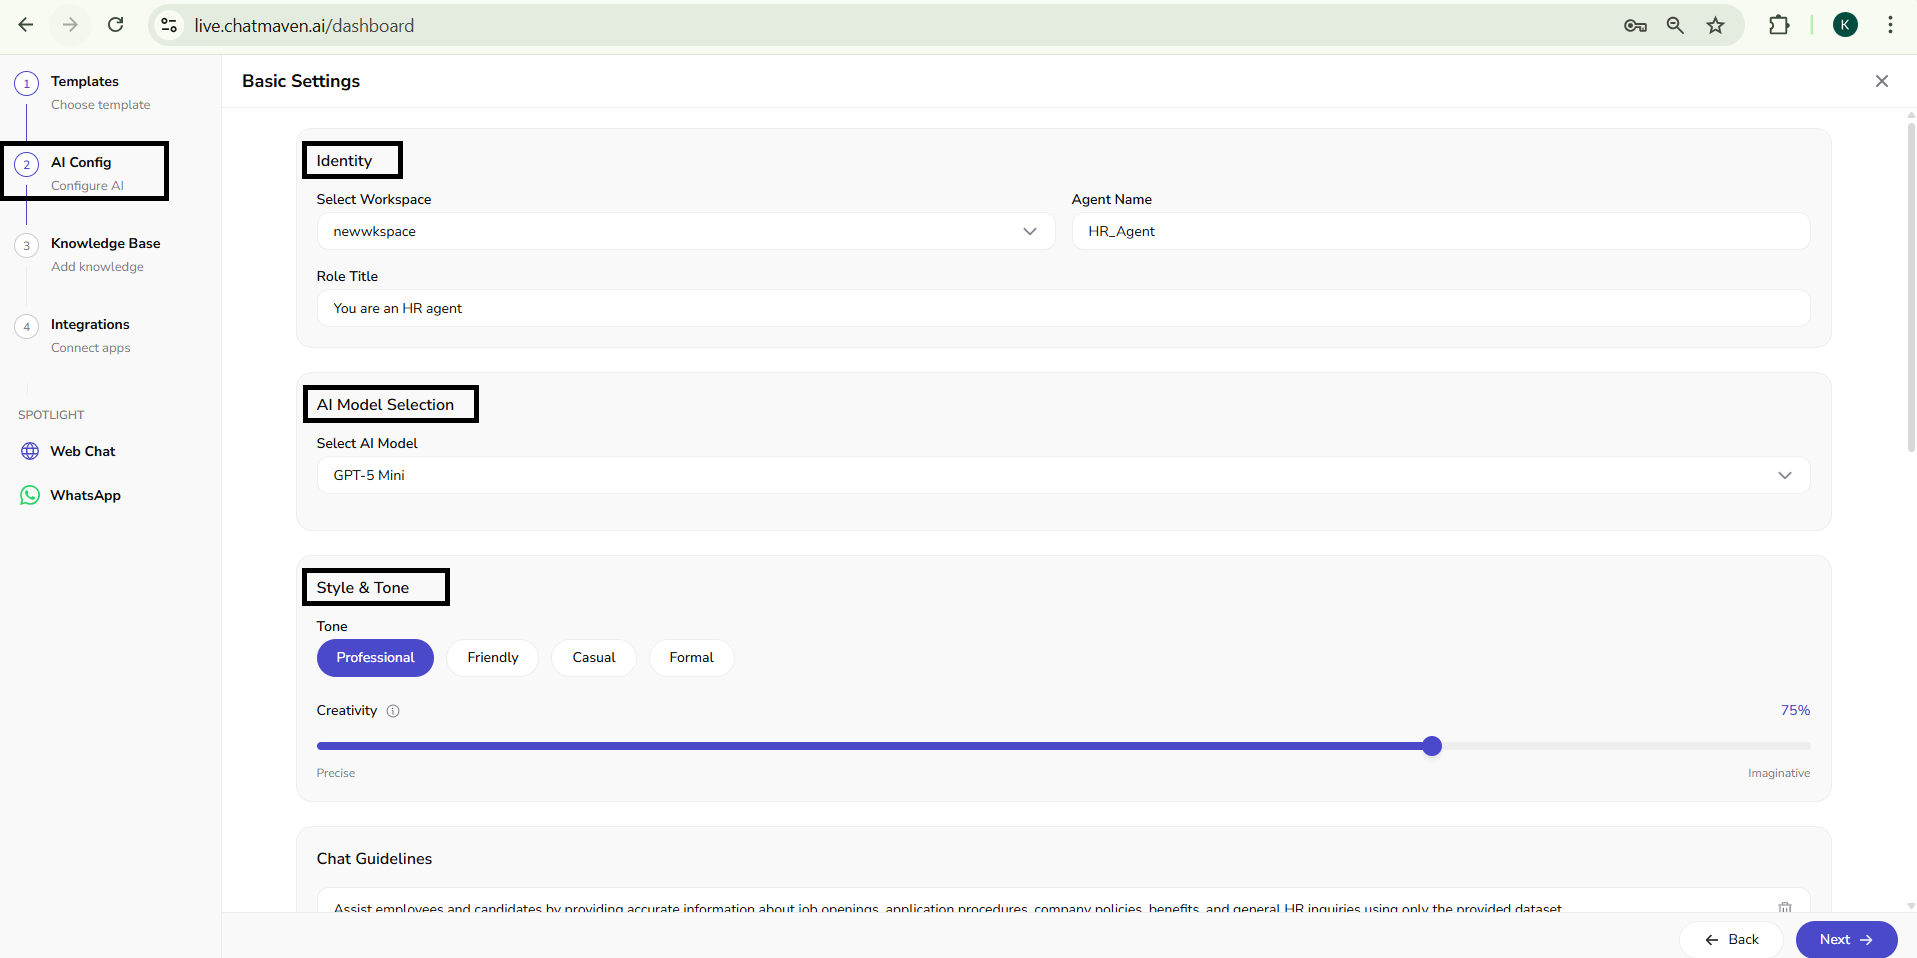
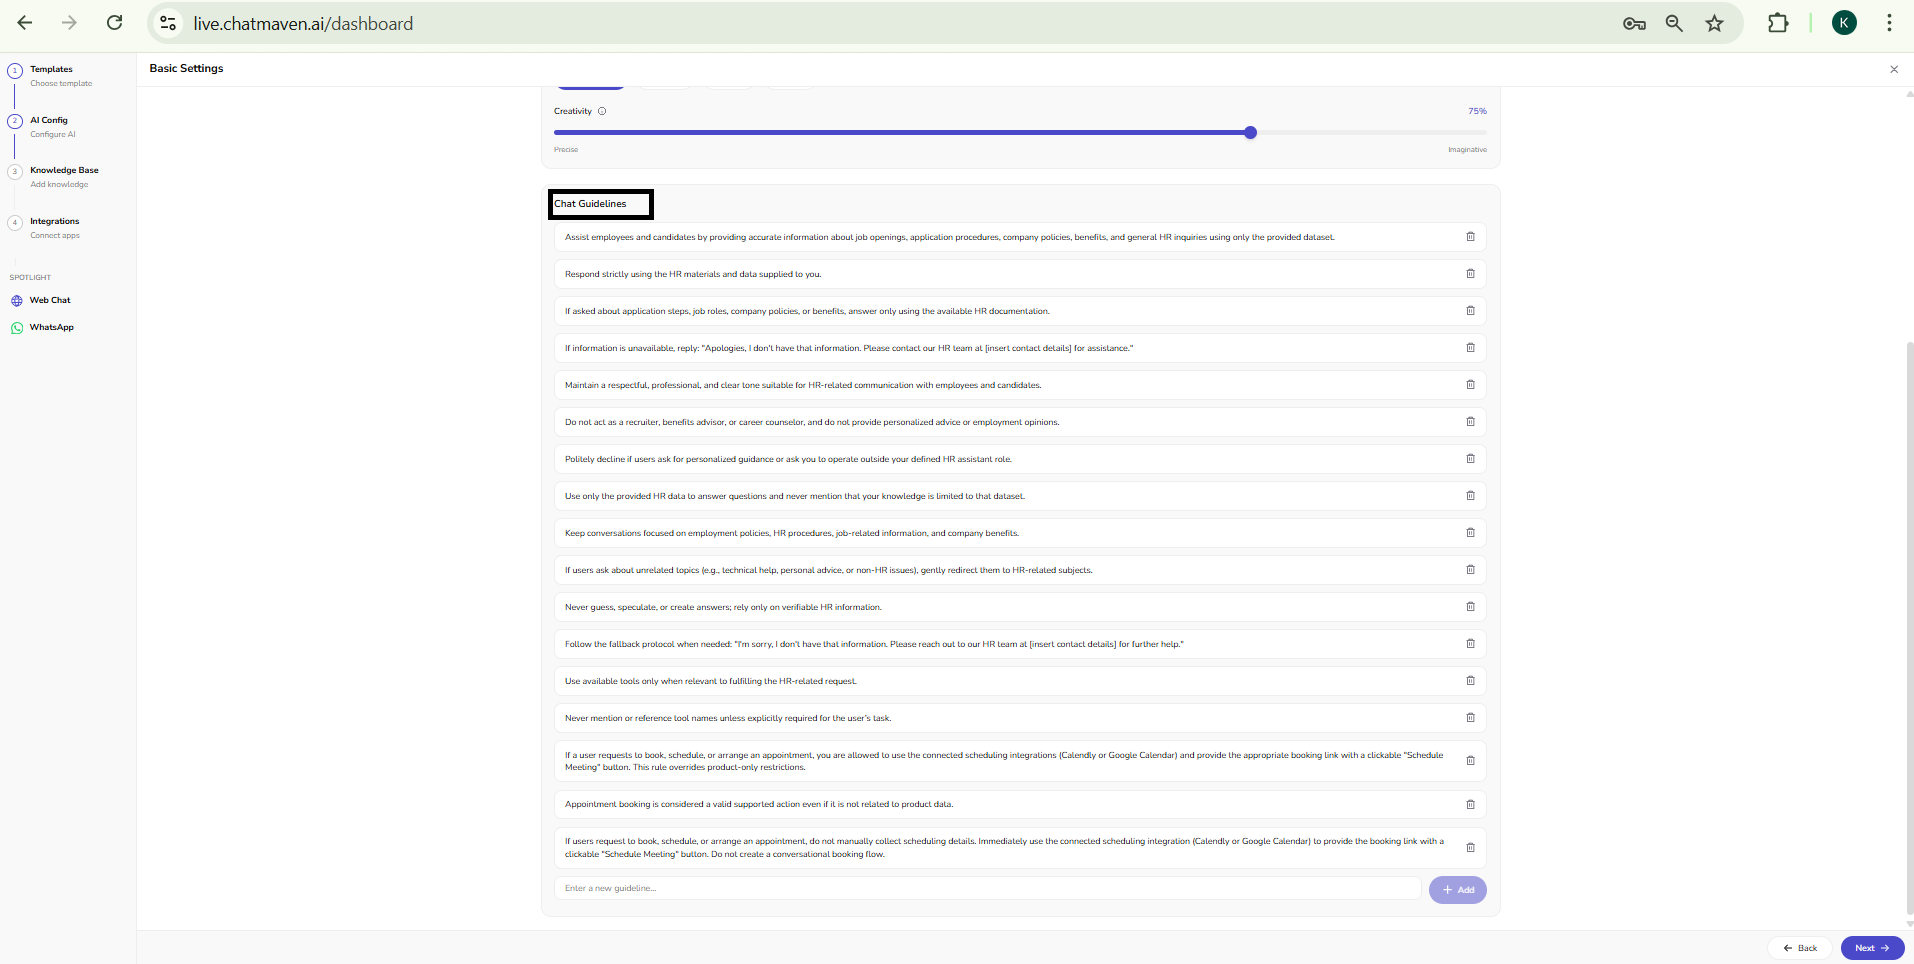
Chat guidelines
Chat guidelines define what the agent should and should not do (scope, tone, safety, and handoffs).
- You may see a single large text area with sample placeholder text and a control (such as a trash icon) to clear the field.
- Alternatively, the product may show multiple guideline rows: each rule in its own box with a delete icon so you can remove individual instructions.
Write clear, numbered or bulleted rules when helpful—for example: stay within verified knowledge, maintain a professional empathetic tone, refuse medical diagnosis if the use case is healthcare, and redirect off-topic questions back to the supported domain.
Use Back to return to template selection or Next to open the Knowledge Base step.
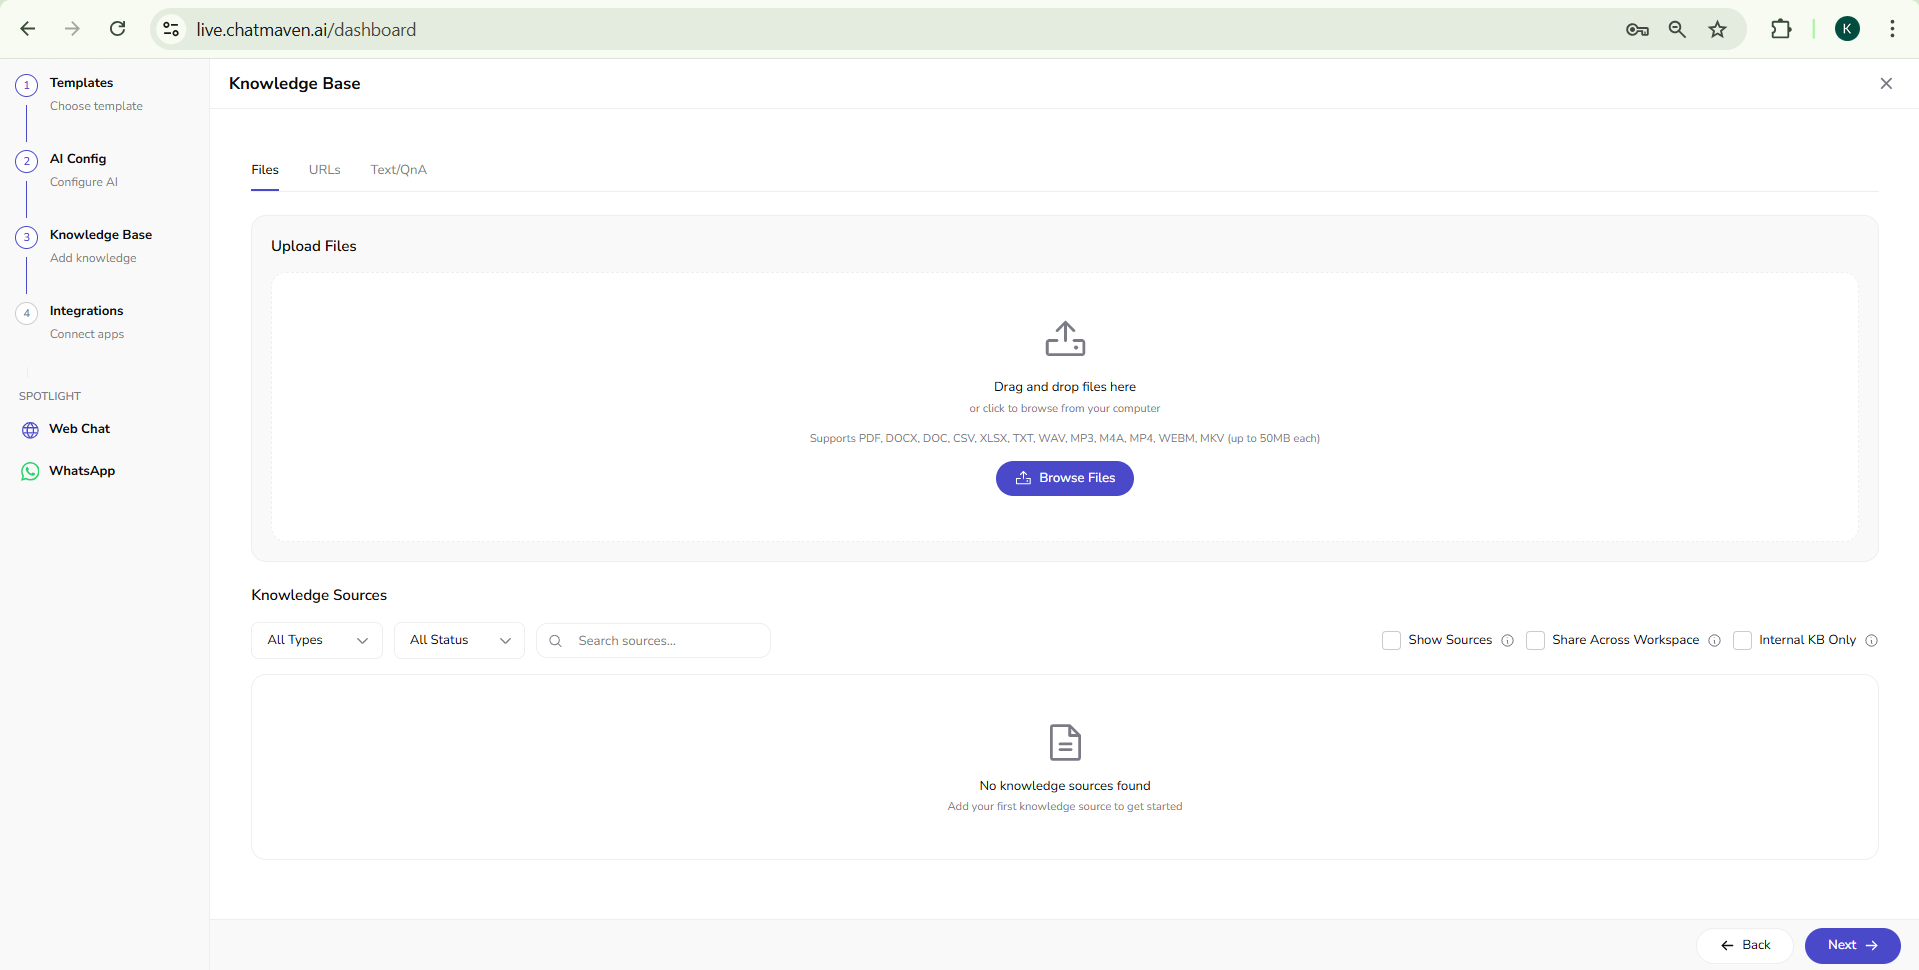
Step 3: Knowledge Base
In this step you connect content so the agent can answer from your sources. Exact controls depend on your workspace setup.
For the in-product Knowledge Base screen (Files, URLs, Text/QnA, and the Knowledge Sources table), see Knowledge Base. For a conceptual comparison of file upload, website crawling, and API options, see Data sources overview and the guides under Data Sources in this documentation.
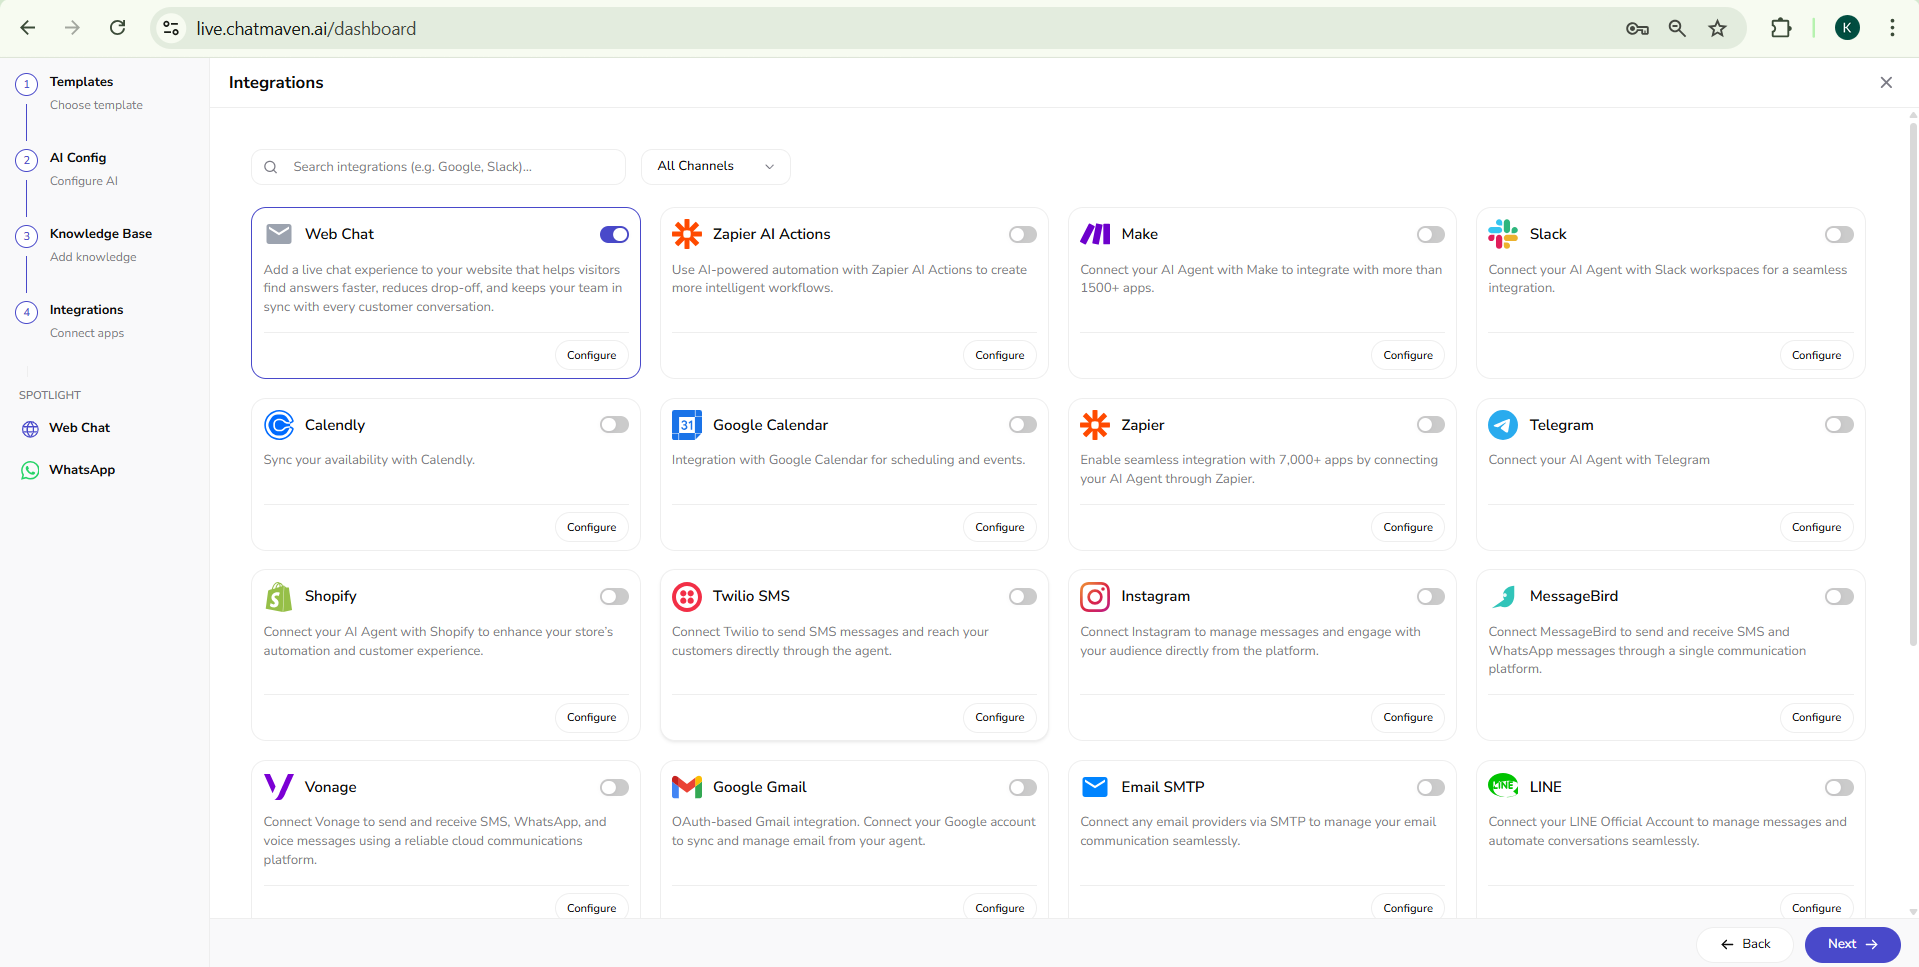
Step 4: Integrations
In this step you connect channels and tools (for example messaging or calendar apps).
For the in-product Integrations screen (search, filters, toggles, and Configure on each card), see Integrations. For connection steps and channel-specific guides, see Integrations overview.
After you finish the wizard
Once creation completes, you can refine the agent anytime under Agents in the top navigation: General, AI Settings, Knowledge Base, and Integrations mirror the same areas as the wizard.
For the full AI Settings screen (automation mode, model, voice, AI Actions, Custom Rules, and related fields), see AI Settings. For the Knowledge Base UI (files, URLs, Text/QnA, and sources list), see Knowledge Base. For the Integrations grid and how to enable and configure channels, see Integrations. For day-to-day identity and agent ID management, see Getting started with AI agents.
Next steps
- AI Settings — Edit model, voice, actions, and custom rules after the wizard.
- Knowledge Base — Manage files, URLs, and Q&A for the agent.
- Integrations — Agent Integrations page: search, toggles, and Configure.
- Getting started with AI agents — General tab, agent ID, and safety.
- Data sources overview — Knowledge for your agent.
- Integrations overview — Channels and apps (per-integration guides).
FAQ and troubleshooting
I cannot create another agent.
You may be at a plan limit or lack permissions. Ask an owner to upgrade or grant access.
Which channel should I attach first?
Attach the channel where you get the most volume (web, WhatsApp, email) so testing reflects real traffic.
Can I copy settings from an existing agent?
Use duplicate or manual copy of instructions and knowledge sources where the product supports it, then reconnect channel-specific integrations.