Flows overview
Flows are workspace-scoped automations: a trigger starts a journey, steps on a canvas define what happens next, and optional agent, channel, and WhatsApp scoping limits where the flow runs. Turn a flow on with the Active toggle when you are ready for it to execute.
Live URL: live.chatmaven.ai/workspaces/flows
- Sign in to ChatMaven.
- Top bar: Workspaces.
- Sidebar: Flows.
You can also open sibling workspace areas from the same sidebar: Agents, AI Tasks, Templates, Forms, Files Library, Tags, Custom Fields, and Roles.
A flow consists of a trigger and one or more steps connected on the canvas. Use My flows for flows you own; use Templates for starter designs (not the same as workspace Templates for message copy).
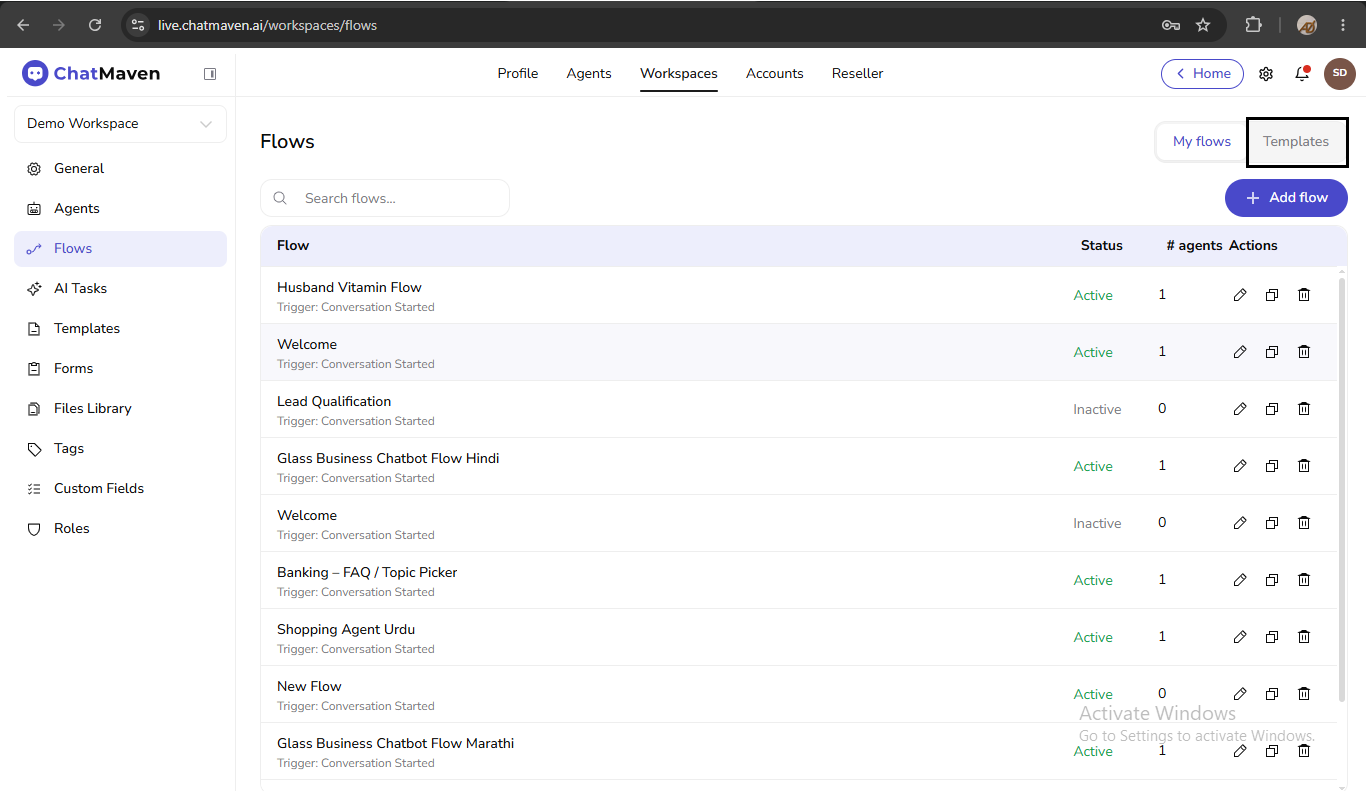
Flows list
On My flows, ChatMaven shows a searchable table of flows in the current workspace.
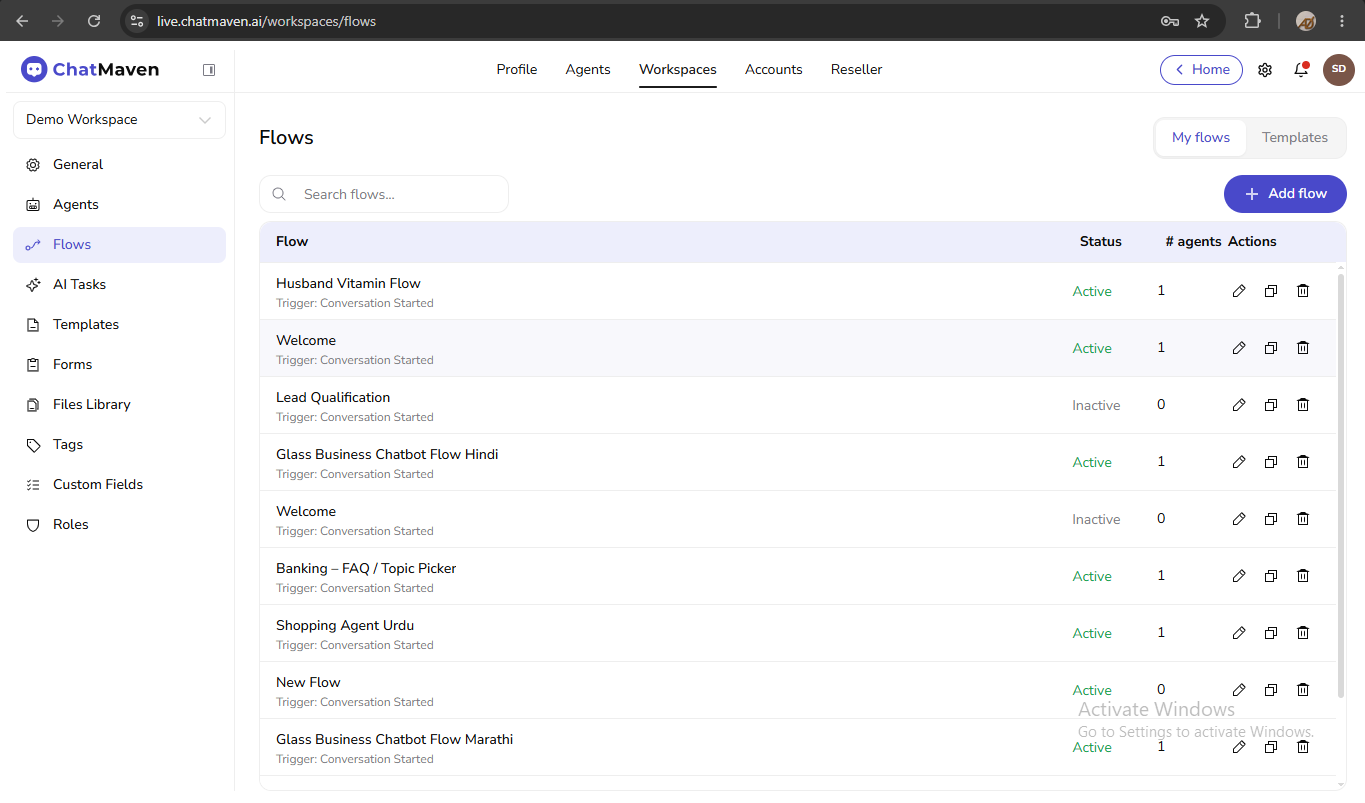
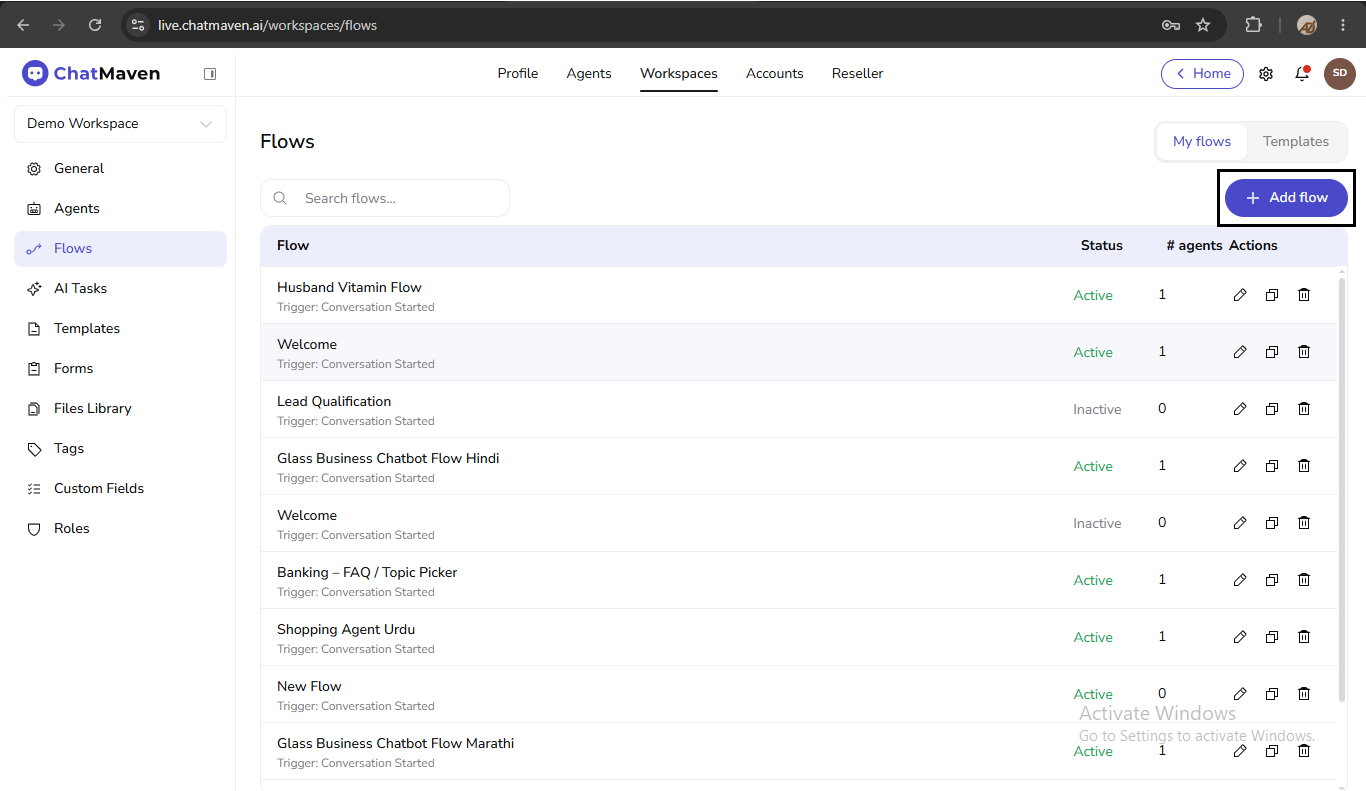
- Search flows… filters by name.
- Add flow opens the flow builder for a new flow.
- Pagination appears when you have many flows (for example
1–20 of 27 flows).
List columns
| Column | Meaning |
|---|---|
| Flow | Name and a short trigger summary (for example Conversation Condition Match when message contains 'help'). |
| Status | Active or Inactive. |
| # agents | How many agents this flow is scoped to. |
| Actions | Edit, duplicate, delete. |
Unlike some platforms that use Draft / Published / Stopped, ChatMaven uses a single Active toggle in the builder and reflects status in this column.
Actions you can perform
From the Flows module you can:
- Create a new flow
- Create from a flow template
- Save a flow
- Test a flow
- Activate or deactivate a flow
- Edit, duplicate, or delete a flow
Configure triggers and individual steps in the dedicated guides: Trigger and Steps.
Create a flow
- On My flows, click Add flow.
- ChatMaven opens the flow builder with a START node and the STEPS palette.

- Set the flow name in the header.
- Choose a trigger on the START node.
- Drag steps from STEPS onto the canvas and connect them.
- Configure each step in the right-hand panel, then Save the flow.
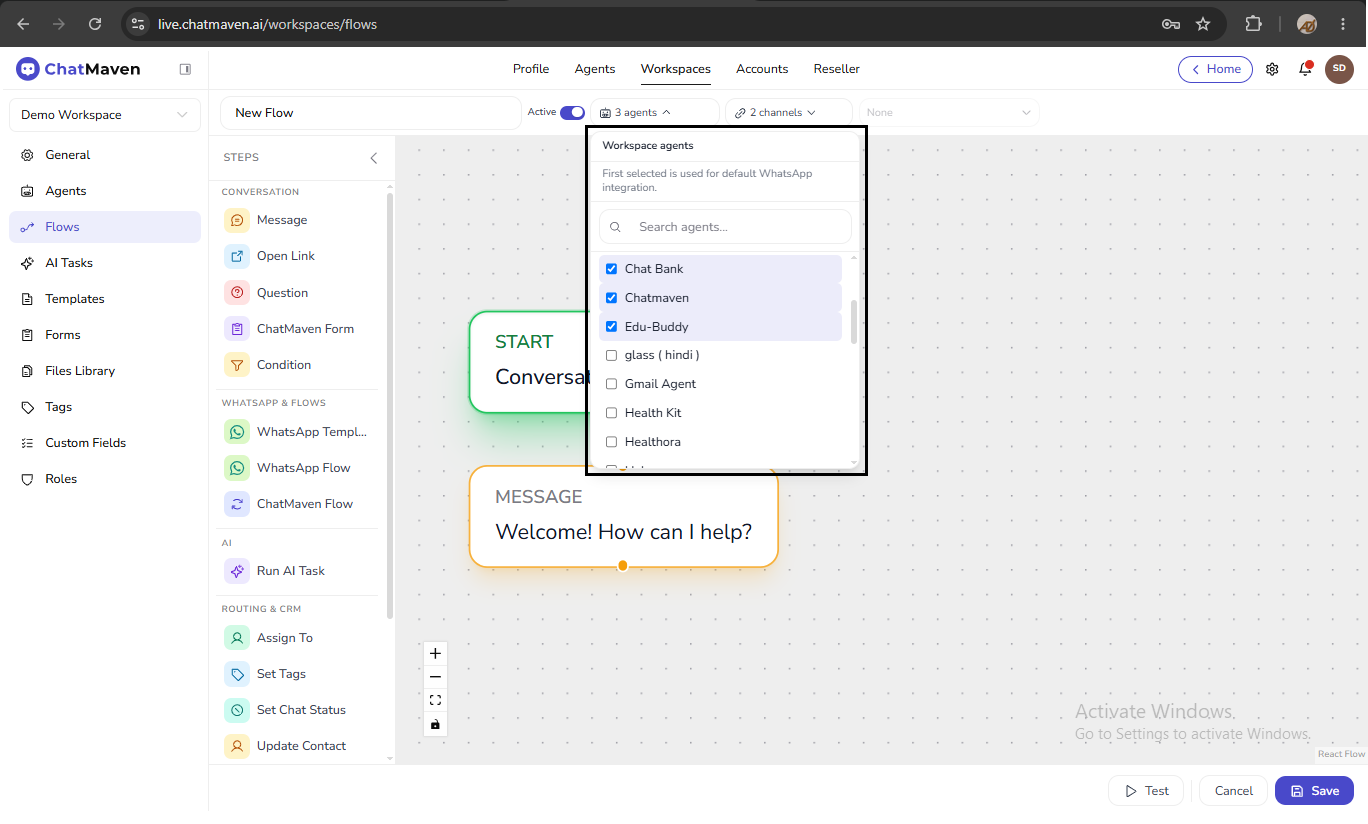
Scope the flow (optional)
In the builder header you can limit where the flow runs:
| Control | Purpose |
|---|---|
| Active | When on, the flow can run for matching conversations. |
| Agent | Restrict to one or more agents in the workspace. |
| Channels | No selection = all channels. Check channels to restrict (for example Web Chat and WhatsApp only). |
| WhatsApp integration | When WhatsApp is in scope, pick the linked WhatsApp number for this flow. |
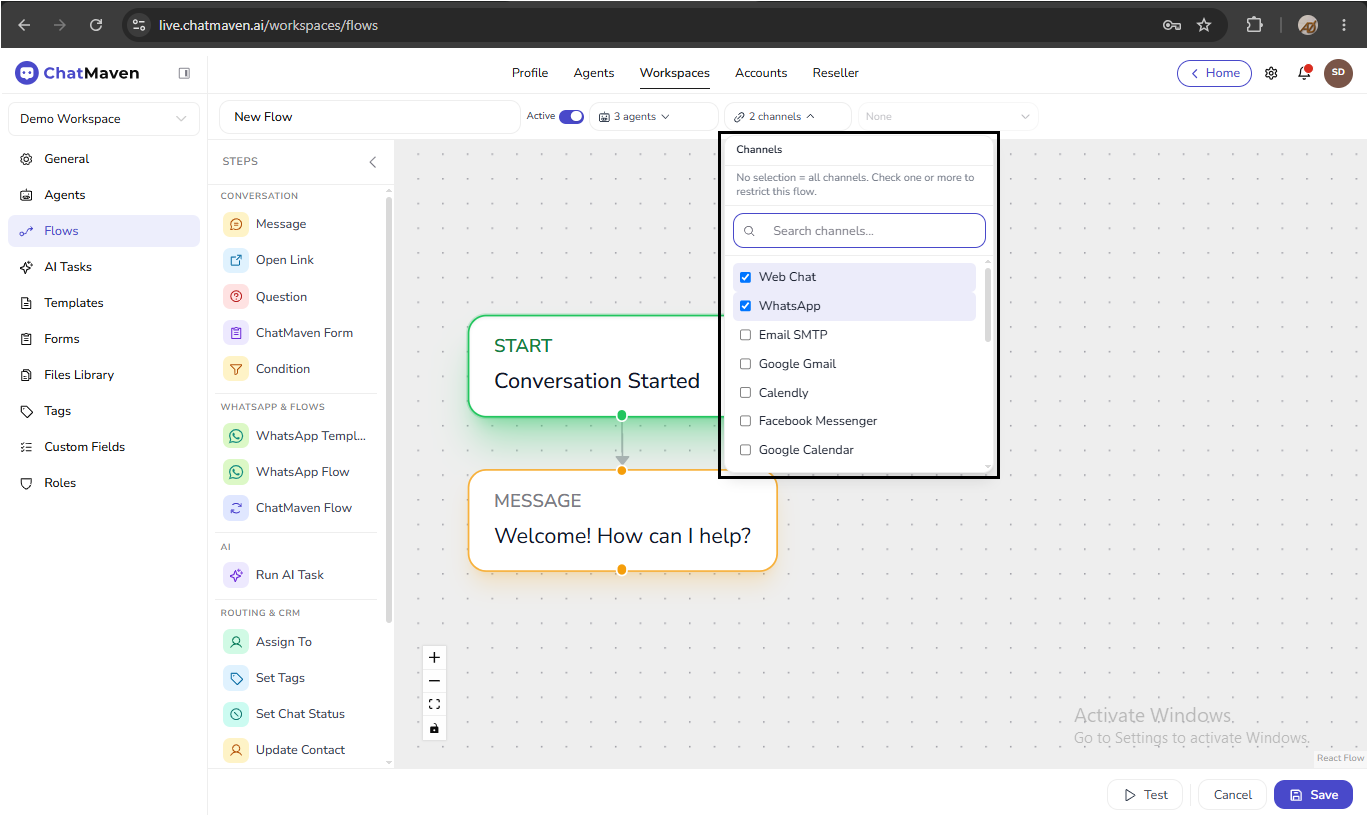
WhatsApp integration (phone number)
Next to the Channels dropdown, the WhatsApp integration control selects which WhatsApp number this flow uses for WhatsApp-specific steps.
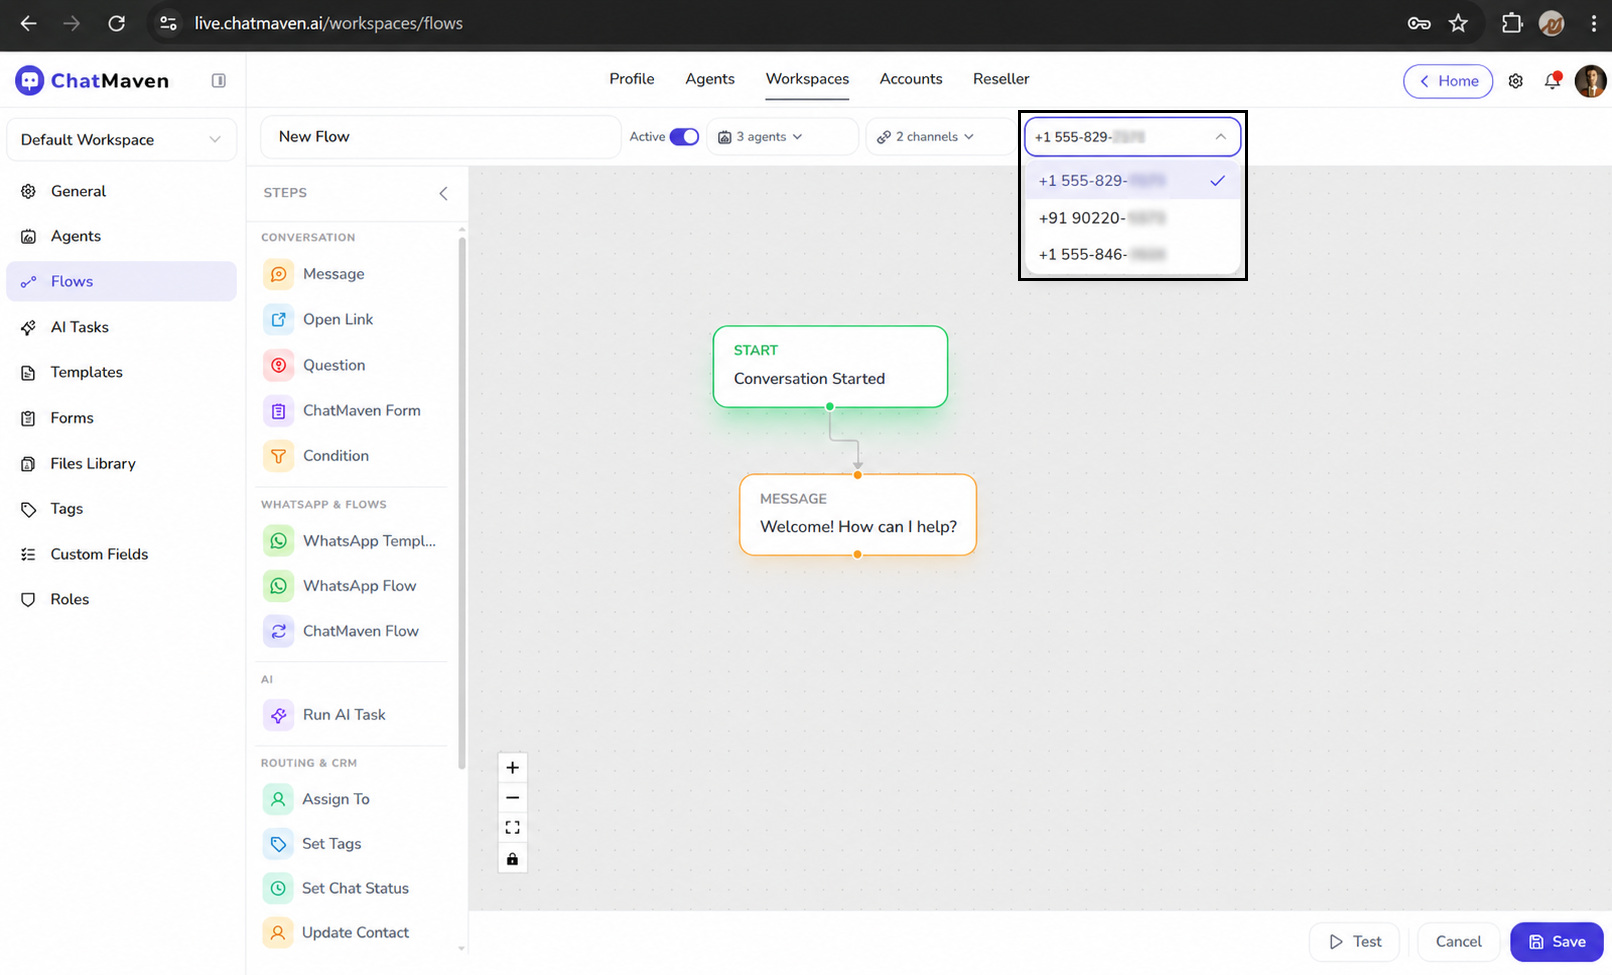
- The dropdown lists WhatsApp numbers connected to the agent(s) selected in the flow header.
- Required for WhatsApp Template and WhatsApp Flow steps to load templates and Meta flows. See WhatsApp & flows.
- Shows None when no selected agent has WhatsApp connected, or when WhatsApp is not included in channel scope.
- To use WhatsApp steps: scope the flow to WhatsApp in Channels, select the correct agent(s), then pick the phone number here.
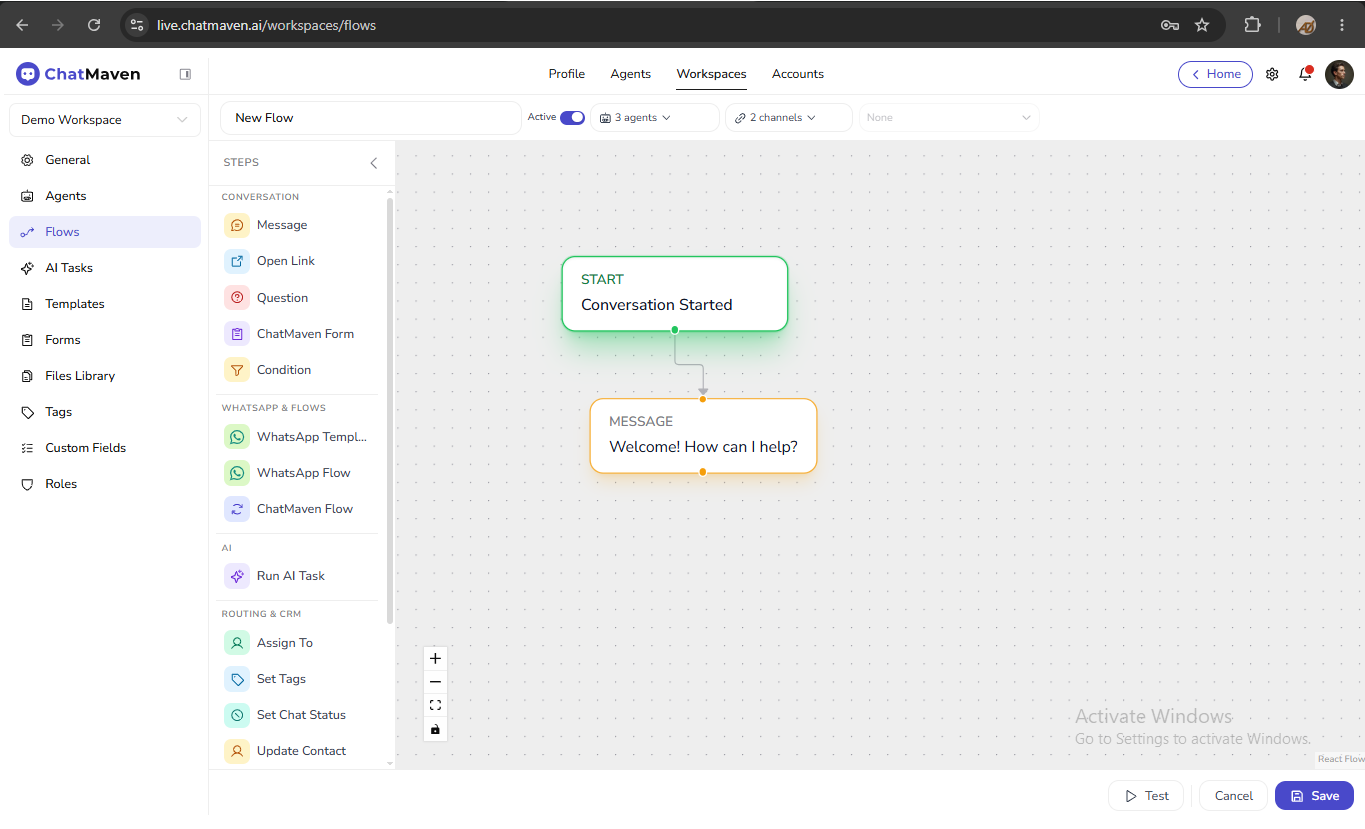
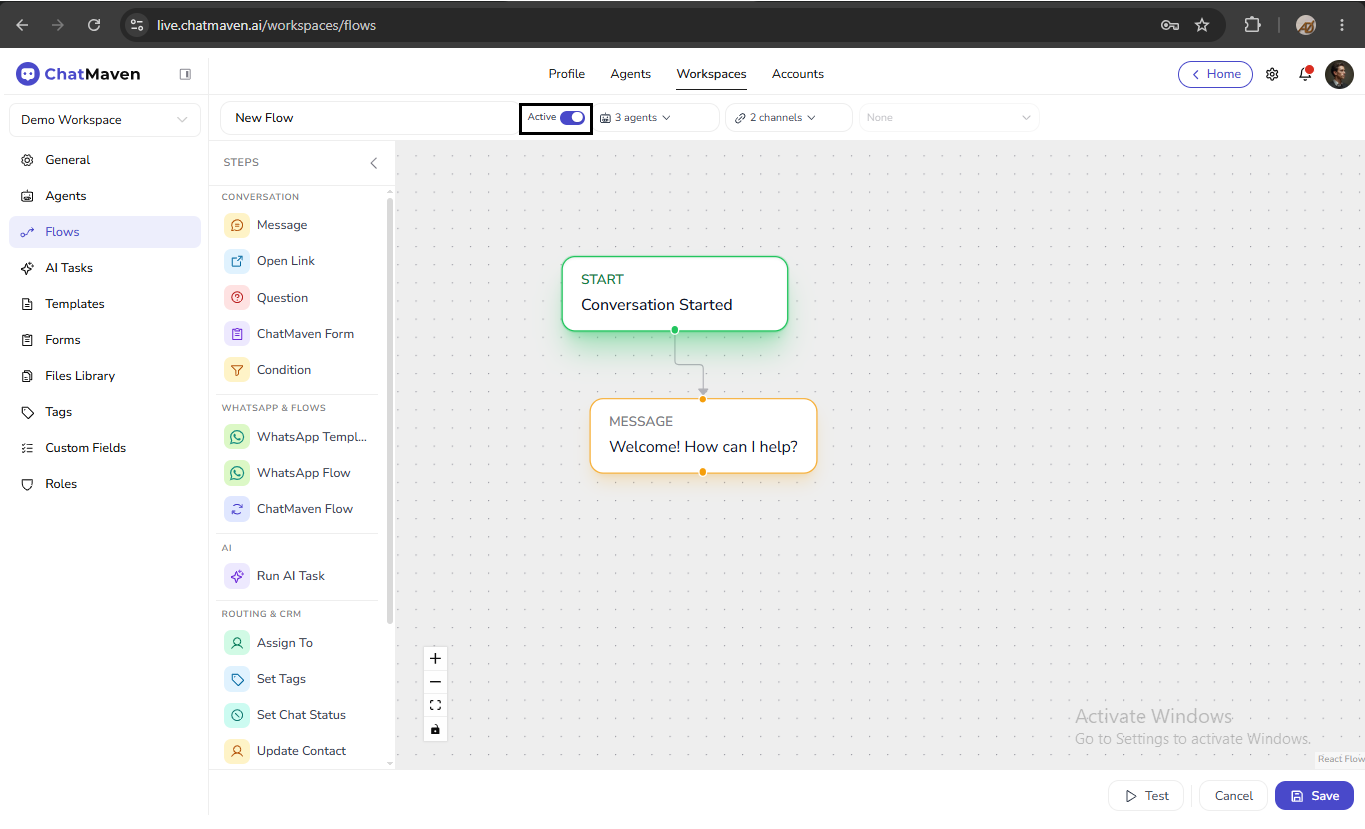
The flow builder
The builder has four main areas:
| Area | Purpose |
|---|---|
| Top bar | Flow name, Active, agent/channel/WhatsApp scope, Test. |
| STEPS palette | Draggable step types grouped by category. |
| Canvas | Visual graph of triggers and steps; zoom and fit controls at the bottom. |
| Configuration panel | Opens when you select a node; edit fields and Save that step. |
Complex flows can chain menus, conditions, nested flows, WhatsApp templates, and integrations. The canvas is only a map of your logic—not every flow uses every step type.
Canvas controls:
- Zoom in / Zoom out
- Fit view
- Toggle interactivity (lock or unlock panning)
Step types are documented by category under Steps in the sidebar: Conversation, WhatsApp & flows, AI, Routing & CRM, and Integrations.
Configure a step
- Click a step on the canvas.
- Edit settings in the right panel (for example question text, variable name, template, or API mapping).
- Use Save on the panel. Use Cancel at the bottom of the builder to leave without saving the whole flow.
Use {{variableName}} in message and note text to insert values from earlier steps (for example {{answer}}, {{name}}). See Custom fields for keys used in Update Contact and conditions.
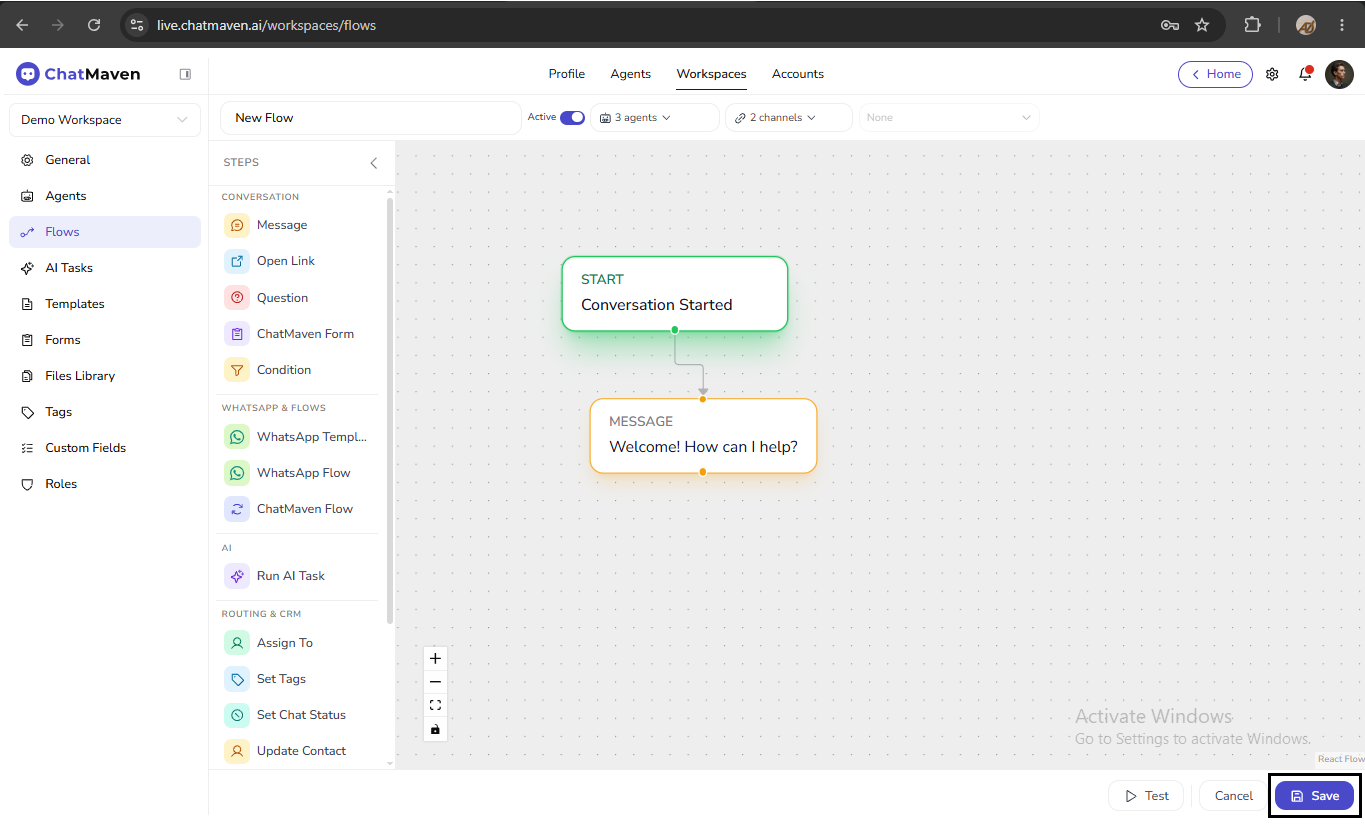
Save a flow
Click Save at the bottom of the builder.
- Resolve step configuration errors before saving when the product blocks save.
- Open Flow validation notes (warning icon next to Save) to see hints—for example variables that may be empty at runtime and will use guest fallback values.
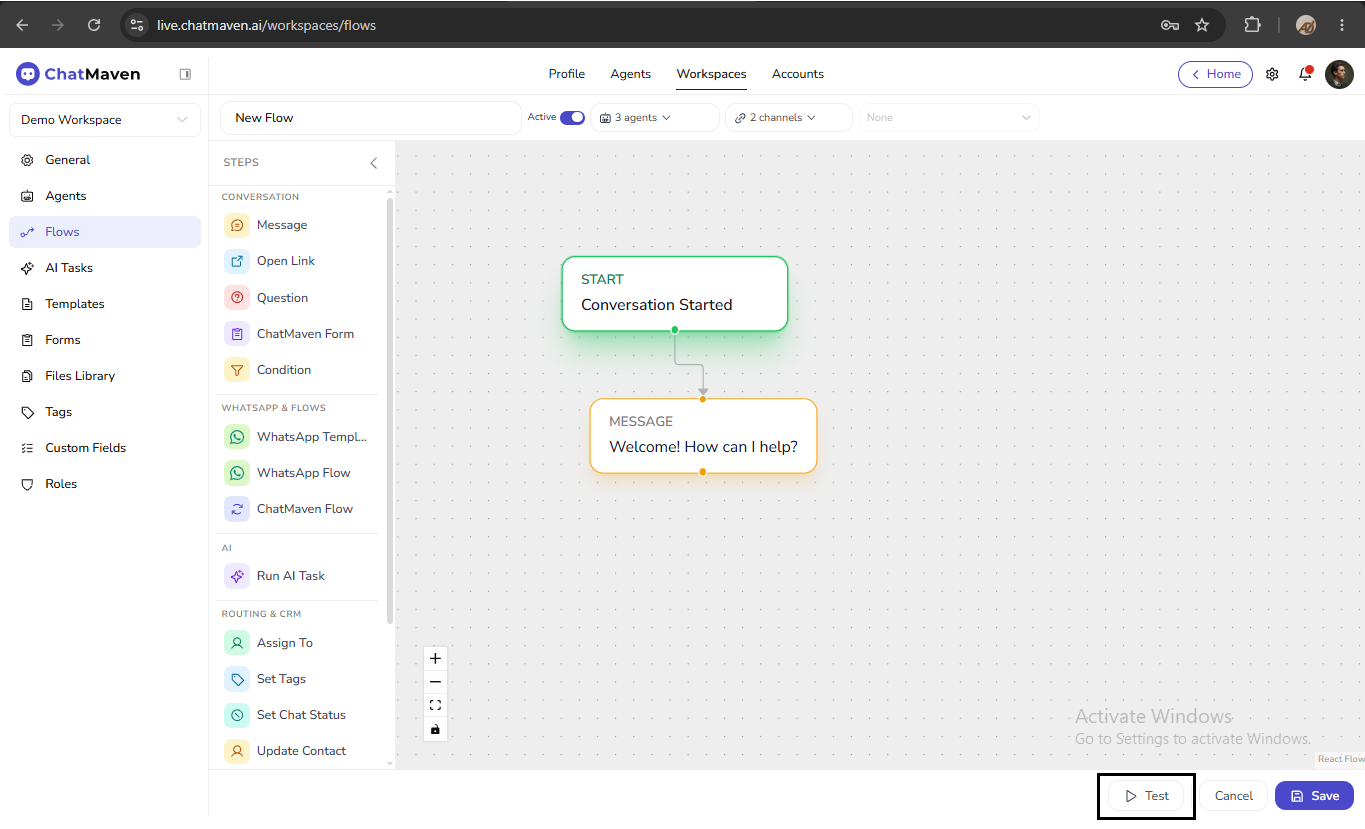
Test a flow
Click Test in the builder header to exercise the flow on a channel the product supports. Testing helps verify triggers, menus, and branches before you leave the flow Active for live traffic.
Activate a flow
Use the Active toggle in the builder header (or ensure the flow shows Active on the list).
- Active — Matching conversations can enter the flow.
- Inactive — The flow does not start for new matches; existing in-progress behavior depends on product rules.
There is no separate Publish or Stop step: activation is the Active switch.
Start from a flow template
- On the Flows page, switch to Templates.
- Use the Domain filter if shown (for example All, Banking & Finance, Healthcare).
- Open Details or click Use template on a card.
- Adjust steps in the builder, then Save.
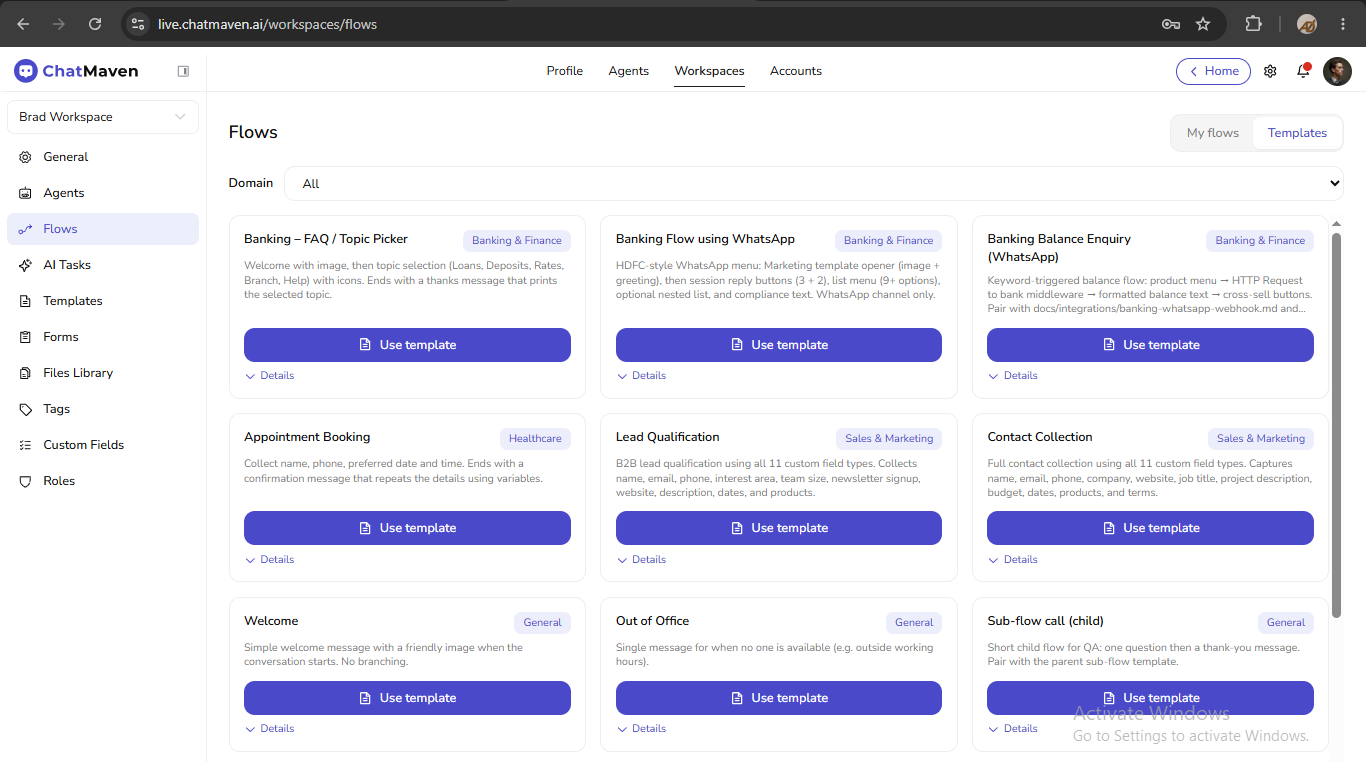
Starter templates include examples such as Welcome, Out of Office, Appointment Booking, Lead Qualification, and Banking – FAQ / Topic Picker.
Edit, duplicate, or delete a flow
Edit
- On My flows, click the pencil (edit) icon in Actions.
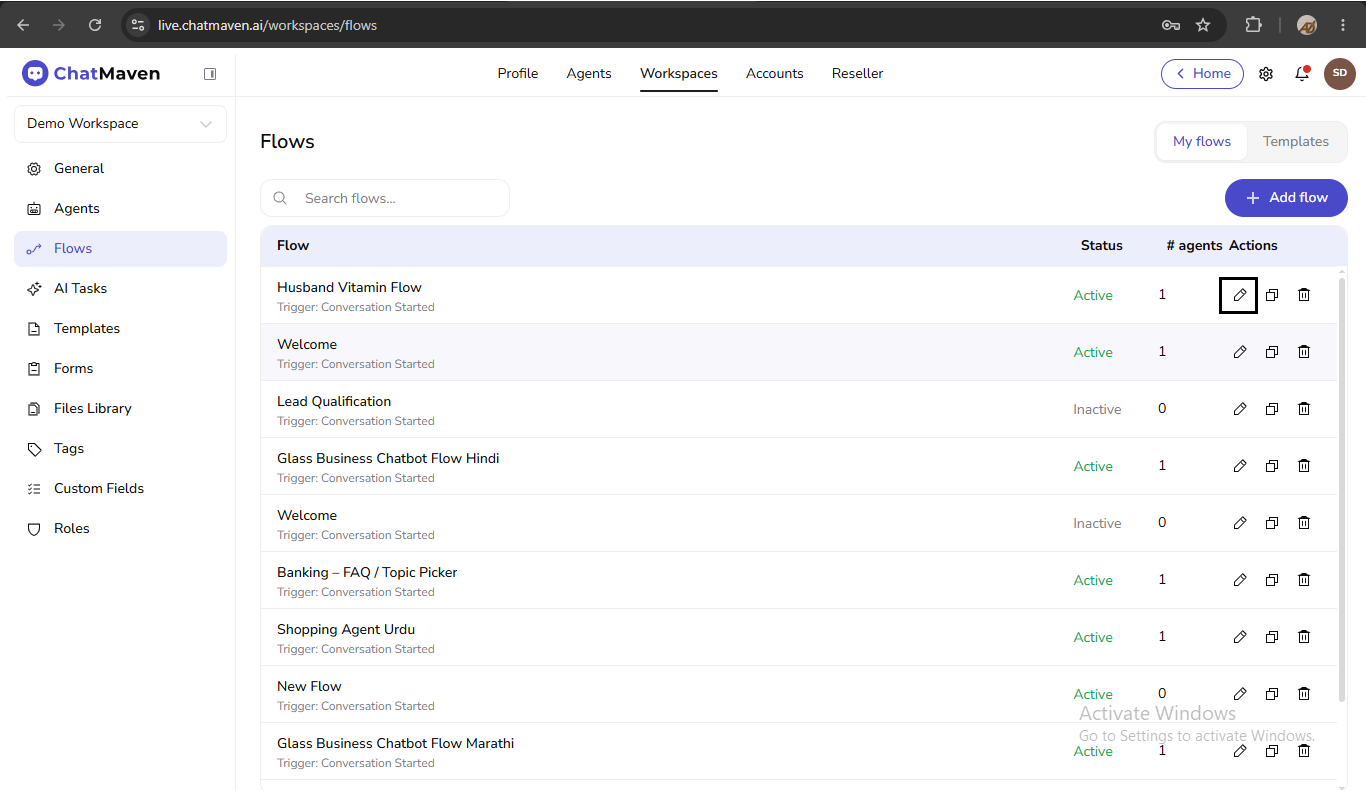
- Change the canvas, scope, name, or Active state, then Save.
Duplicate
Click the duplicate icon in Actions. Rename the copy in the builder.

Delete
- Click the trash icon in Actions.
- Confirm if ChatMaven prompts you.

Variables primer
| Source | Example |
|---|---|
| Question step | Visitor reply stored as answer, main_menu, etc. |
| Set Variable step | Static or computed values for later steps. |
| HTTP Request step | Response fields mapped to variable names (see Integrations). |
| Custom fields | Contact properties via Update Contact or conditions. |
Reference variables in text with {{variableName}}.
FAQ and troubleshooting
Why does my flow not start?
- Confirm Active is on.
- Check the trigger (for example keyword match vs conversation started).
- Confirm agent and channel scope includes the conversation you are testing.
- For WhatsApp, verify the correct WhatsApp integration number is selected.
Can multiple flows run on one conversation?
Multiple flows may match; design triggers and scopes so they do not conflict. Avoid loops when using ChatMaven Flow to call another flow that could trigger the parent again.
Why did the flow end early?
- The contact took a branch with no follow-up steps (for example Otherwise on a Condition with nothing connected).
- A step failed (for example message outside the messaging window).
- See Conversation steps and category guides for branch and timeout behavior.
What are Flow validation notes?
Warnings about configuration that may work but is risky—commonly variables used in messages that might be empty at runtime. Fix mappings or add fallback text in Message steps.
Do I need every step type in one flow?
No. A single flow might be only a welcome message, or a large menu with nested flows and WhatsApp templates. Add only the steps your use case needs.
Related
- Trigger
- Conversation steps
- WhatsApp & flows
- Templates — Message and WhatsApp template content
- Forms — Used by ChatMaven Form steps
- Custom fields — Keys for Update Contact and conditions
- Getting Started with Workspaces