Conversation steps
Conversation steps handle messaging, links, questions, forms, and branching inside a flow. Drag a step from the STEPS palette under Conversation, connect it on the canvas, click to configure, and Save in the right-hand panel.
Prerequisite: set a trigger on START, then add steps.
Live URL: live.chatmaven.ai/workspaces/flows
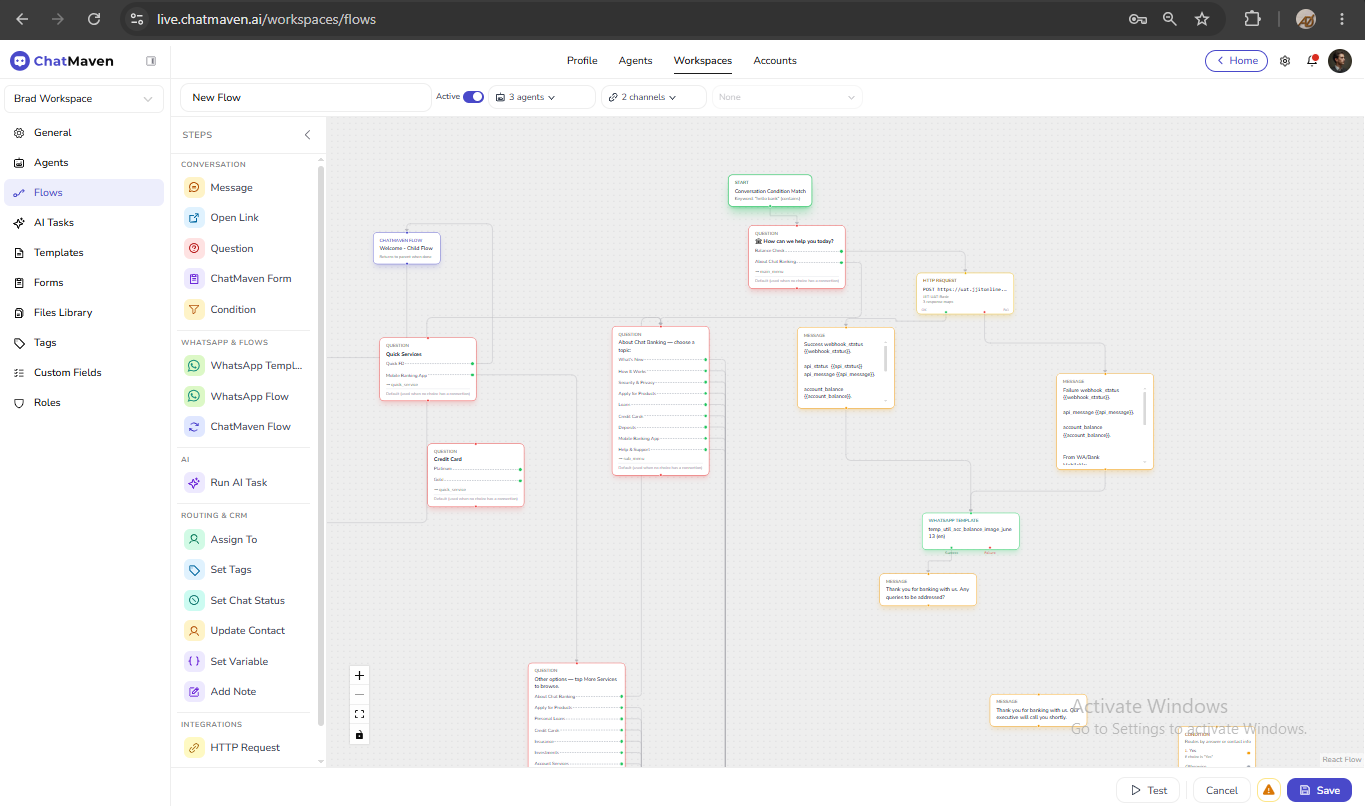
Working with steps
| Action | How |
|---|---|
| Add | Drag from STEPS or use the connector on the canvas. |
| Configure | Click the step; edit the right panel; Save. |
| Connect | Draw edges between nodes to define order and branches. |
| Duplicate | Use the duplicate icon on the selected step card. |
| Delete | Use the delete icon; confirm if branches are removed. |
Use {{variableName}} in text fields to insert values from earlier steps.
Message
Send a conversational message to the contact.
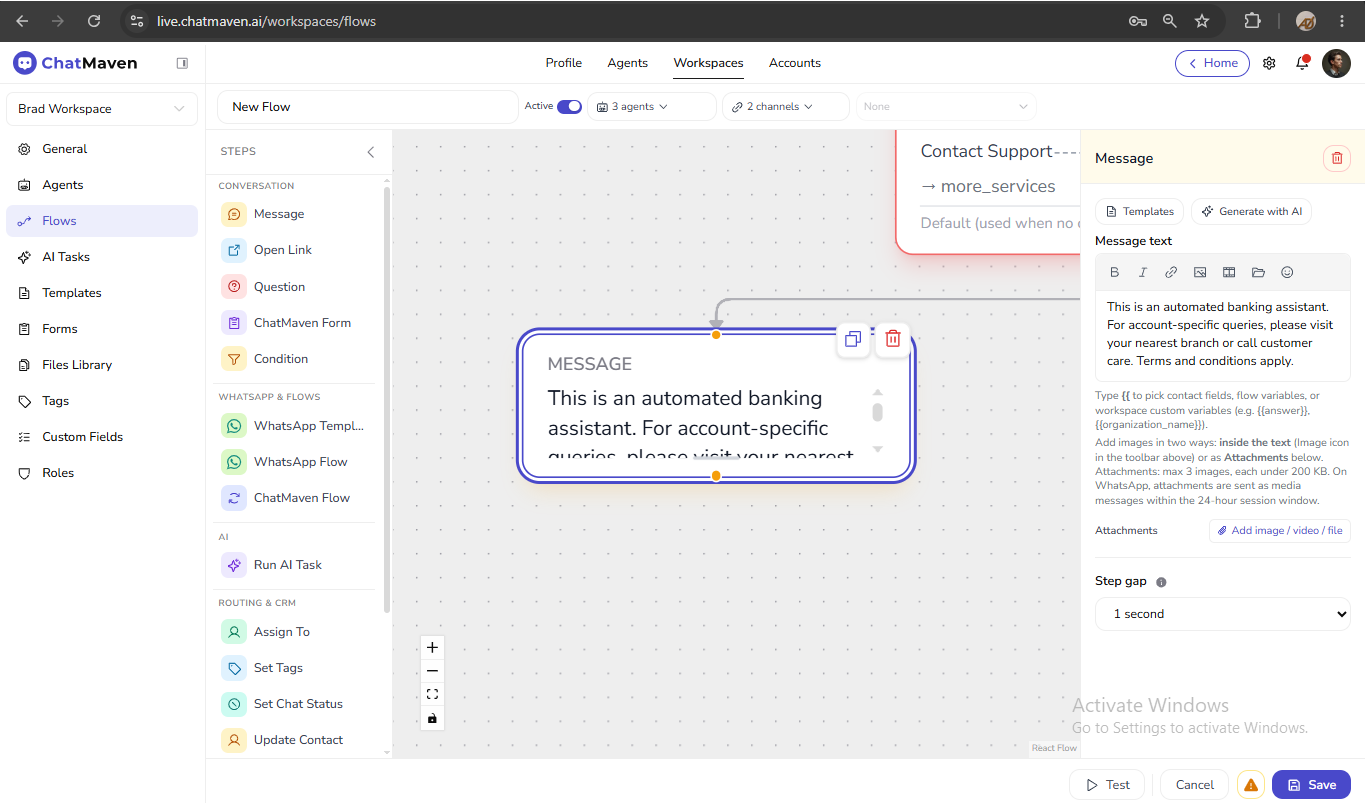
- Add Message from STEPS under Conversation.
- Click the node and enter message text in the right panel.
- Optionally attach image or video where the channel allows.
- Insert variables with
{{variableName}}or pick from the variable list. - Save the step.
Tips:
- Keep first messages short when using keyword triggers.
- For WhatsApp-only template sends outside the session window, use WhatsApp Template on a WhatsApp branch instead. See WhatsApp & flows.
Open Link
Send a link the contact can open (button or URL depending on channel).
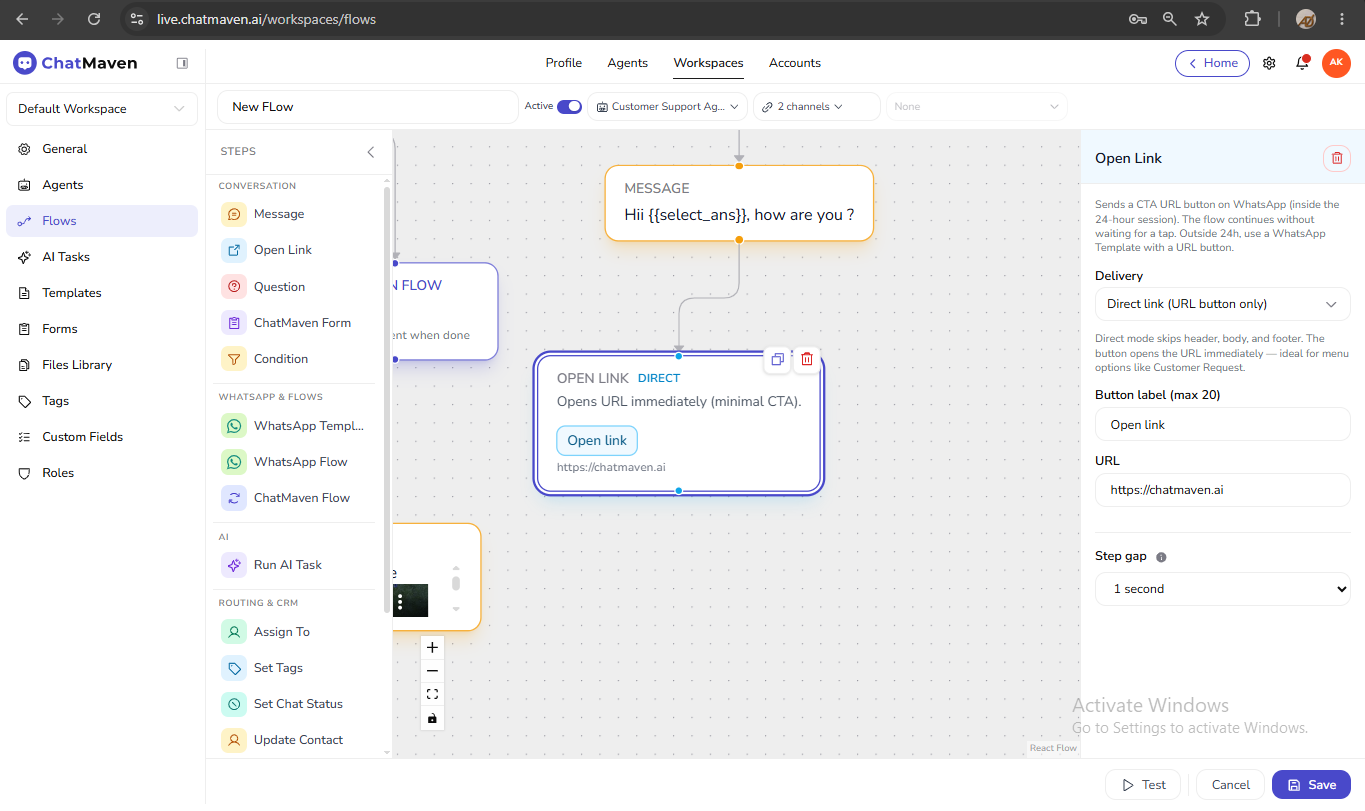
- Add Open Link from STEPS under Conversation.
- Enter the URL and label or button text if the channel supports it.
- Save the step.
Tips:
- Use HTTPS links.
- Pair with Question if you need confirmation after they visit the link.
Question
Prompt the contact and save the reply to a variable.
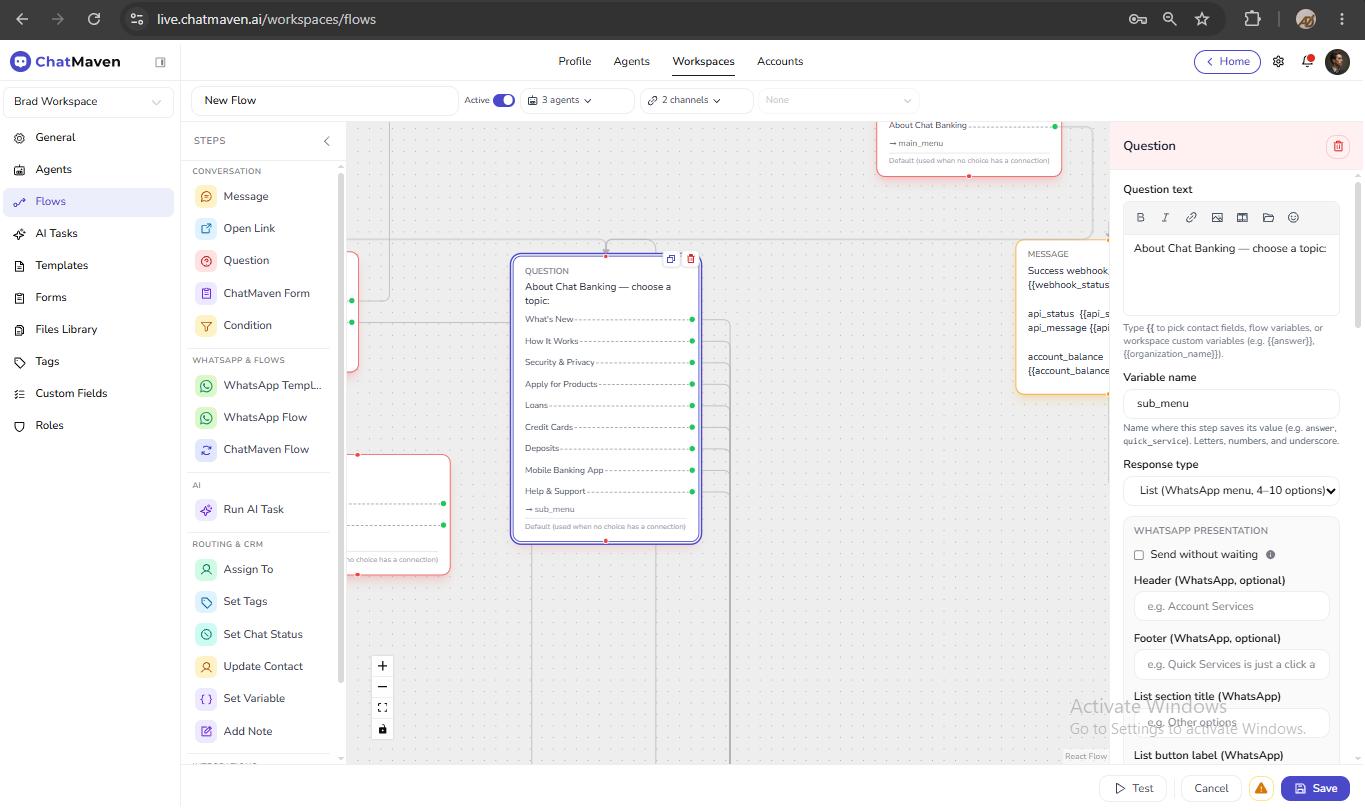
- Add Question from STEPS under Conversation.
- Enter question text (supports formatting and media in the editor).
- Set the variable name (for example
answer,main_menu). - Configure response type (for example text, or choice-style options for menus).
- Save the step.
Tips:
- Name variables clearly; later Condition steps often branch on them.
- Multi-option menus in complex flows behave like questions with named outputs (for example
→ main_menuon the canvas).
ChatMaven Form
Display a workspace form inside the conversation. Use it to collect structured data without building every field as a separate Question step.
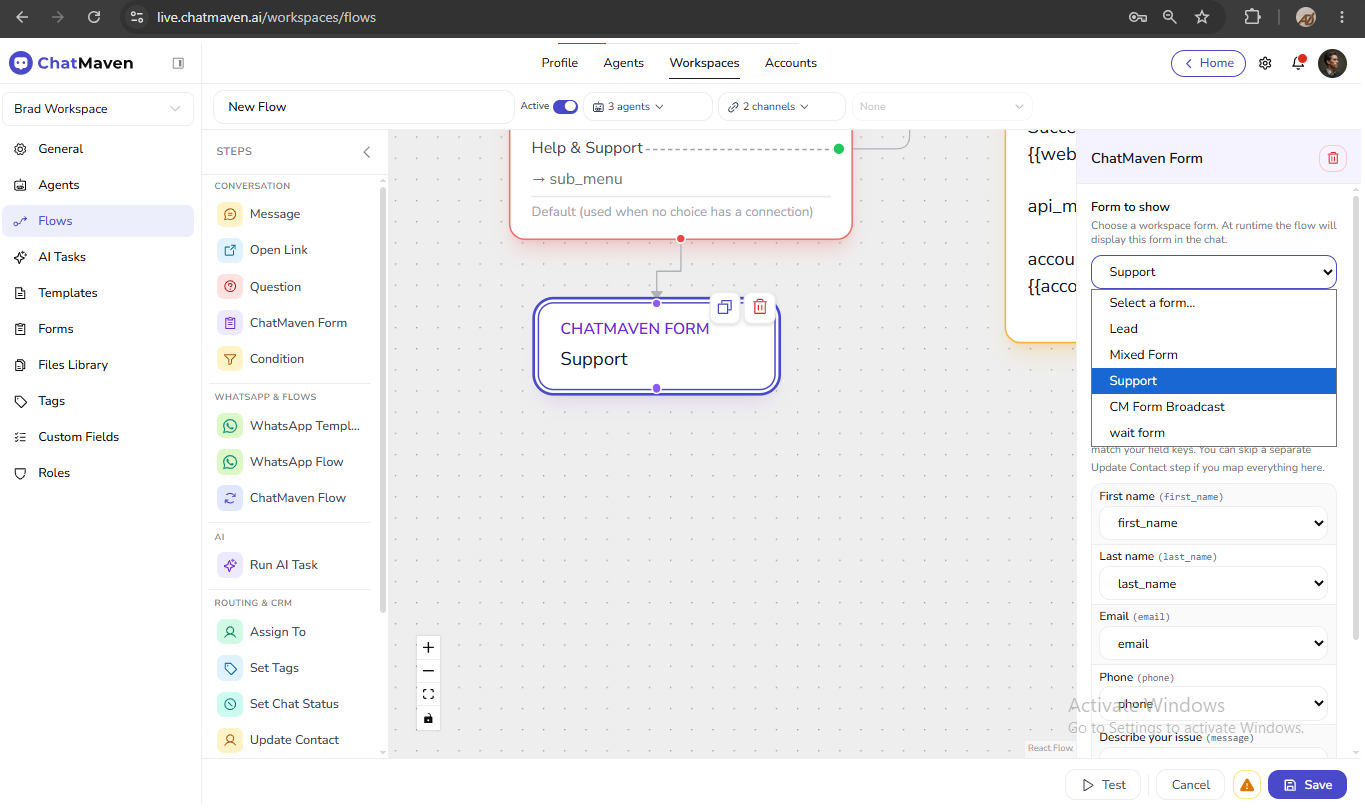
- Create the form under Workspaces → Forms if it does not exist.
- Add ChatMaven Form from STEPS under Conversation.
- Click the node and select the form from the dropdown.
- Optionally map fields to contact attributes in the panel.
- Save the step, then Save the flow.
How it works:
The flow pauses while the contact completes the form. Submissions receive a Submission ID visible on Contacts, Analytics → Forms, and submission details. Fields mapped to contact properties update the contact record when configured on the form.
Tips:
- Reuse forms across agents via workspace Forms instead of duplicating questions in every flow.
- Follow with Message thanking the contact or Add Note for agents.
Condition
Branch the flow based on rules—contact fields, tags, variables from earlier steps, or the contact's last answer.
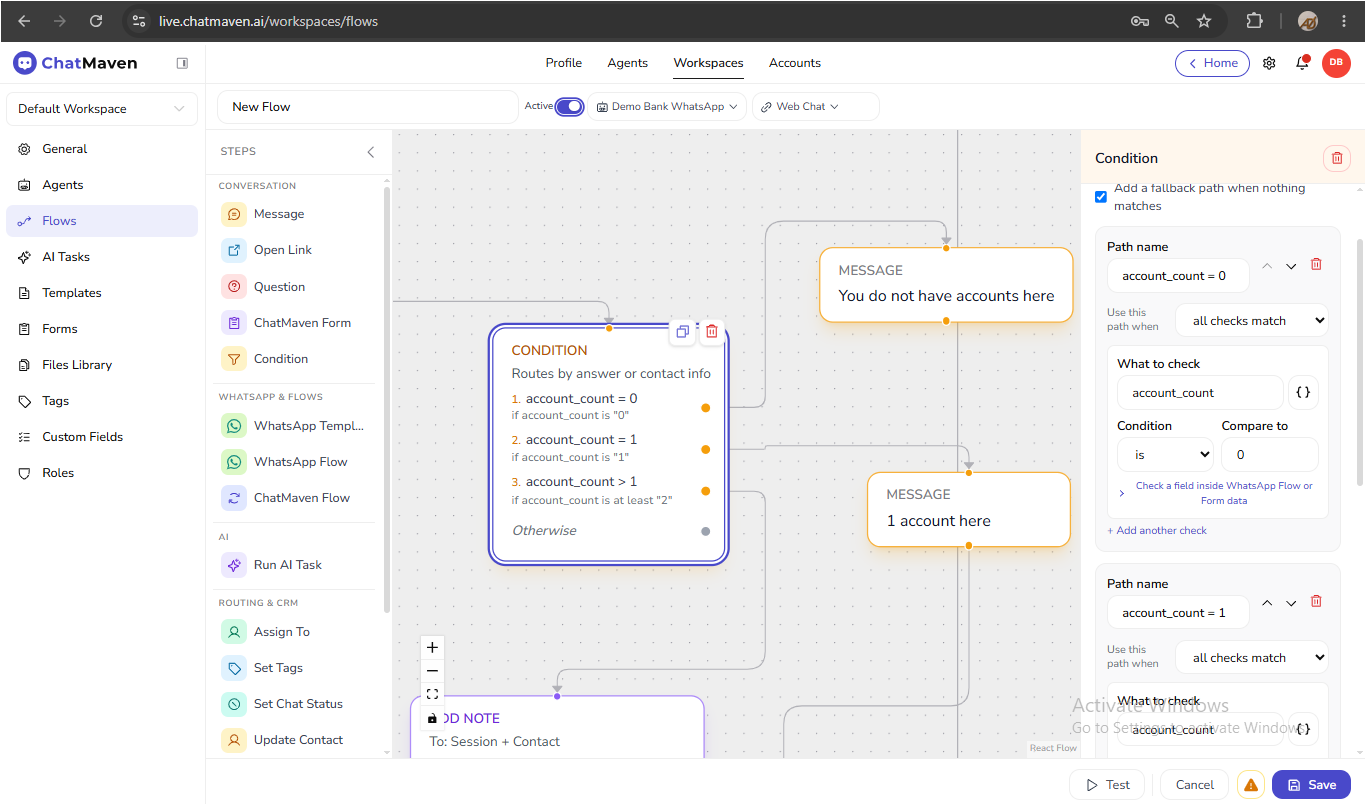
- Add Condition from STEPS under Conversation.
- Connect it after the step that provides the data to evaluate.
- Click the node and define rules in the right panel.
Common rule styles:
| Rule source | Example |
|---|---|
| Answer or choice | Branch when the visitor chose Yes vs other options |
| Contact info | Tag present, custom field equals a value |
| Variable | {{status}} equals 200 after an HTTP step |
The canvas may summarize the step as Routes by answer or contact info with named branches (for example Yes if choice is "Yes" and Otherwise).
- Connect each branch to the next steps. Always wire Otherwise to a fallback path when possible.
- Save the step, then Save the flow.
Tips:
- Add a Message or Question on Otherwise so contacts never hit a dead end.
- For API-driven routing, map HTTP response fields first, then branch on those variables. See Integrations.
- Keep conditions simple; chain multiple Condition steps instead of one overly complex node.
Conversation Condition Match on START decides whether the flow starts. The Condition step branches inside an already-running flow. See Trigger.