Forms
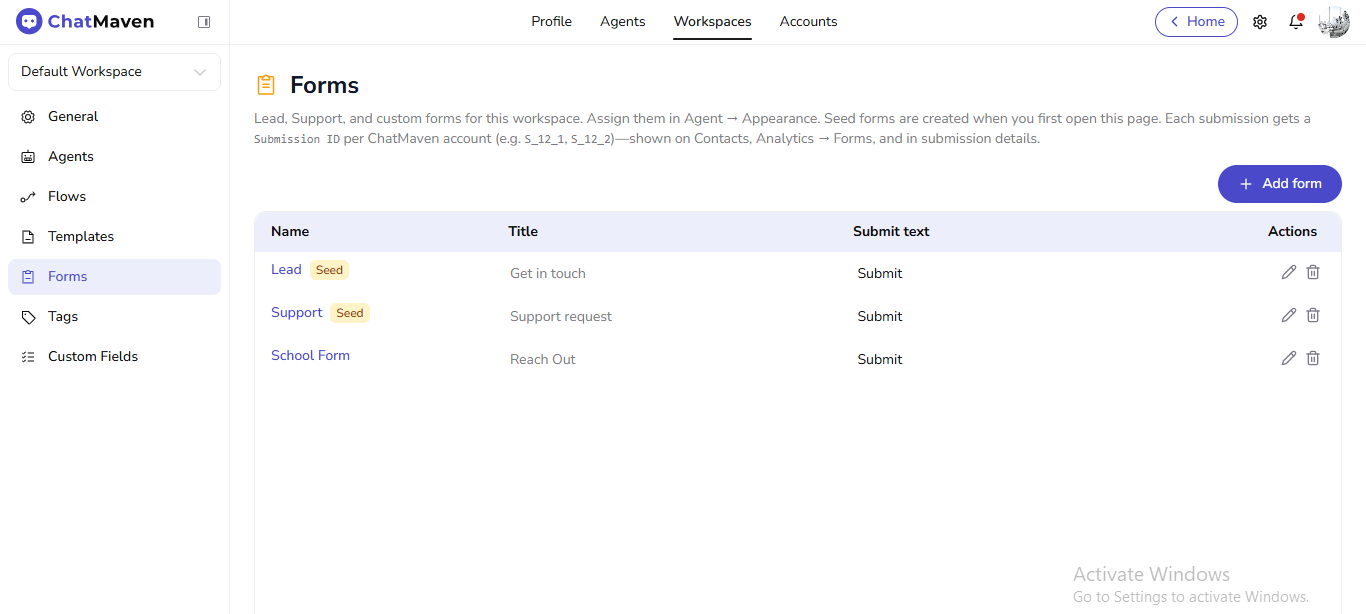
Workspace Forms collect structured details from contacts—leads, support requests, or custom fields you define. Create and manage them under Workspaces → Forms, then trigger any form from Web Chat Appearance, an AI Action, a ChatMaven Flow, or Inbox. Starter rows may show a Seed badge (for example Lead, Mixed Form, Support); custom forms you add appear in the same table.
Live URL: live.chatmaven.ai/workspaces/forms
Forms video
Watch the video below for a walkthrough of workspace Forms. You can also follow the written steps in this guide.
Open the Forms video on Google Drive in a new tab if the player above does not load.
Open Forms
Top bar Workspaces → sidebar Forms.
The table lists Name, Title, Submit text, and Actions.
Create a form
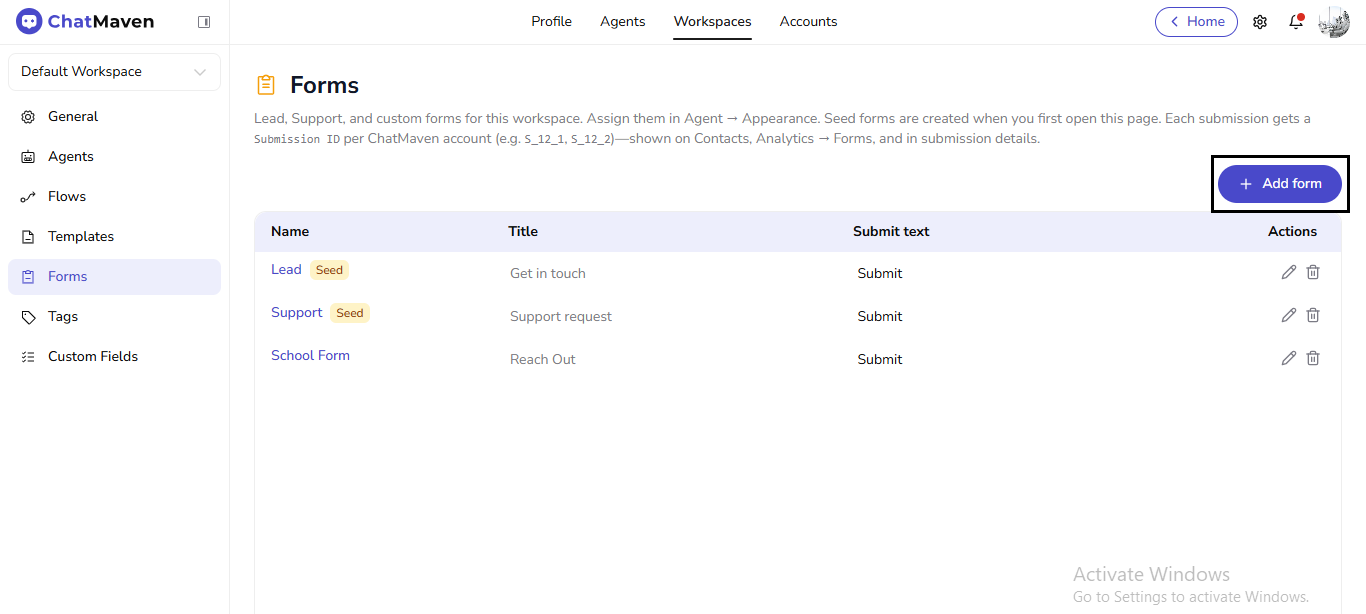
- Click Add form.
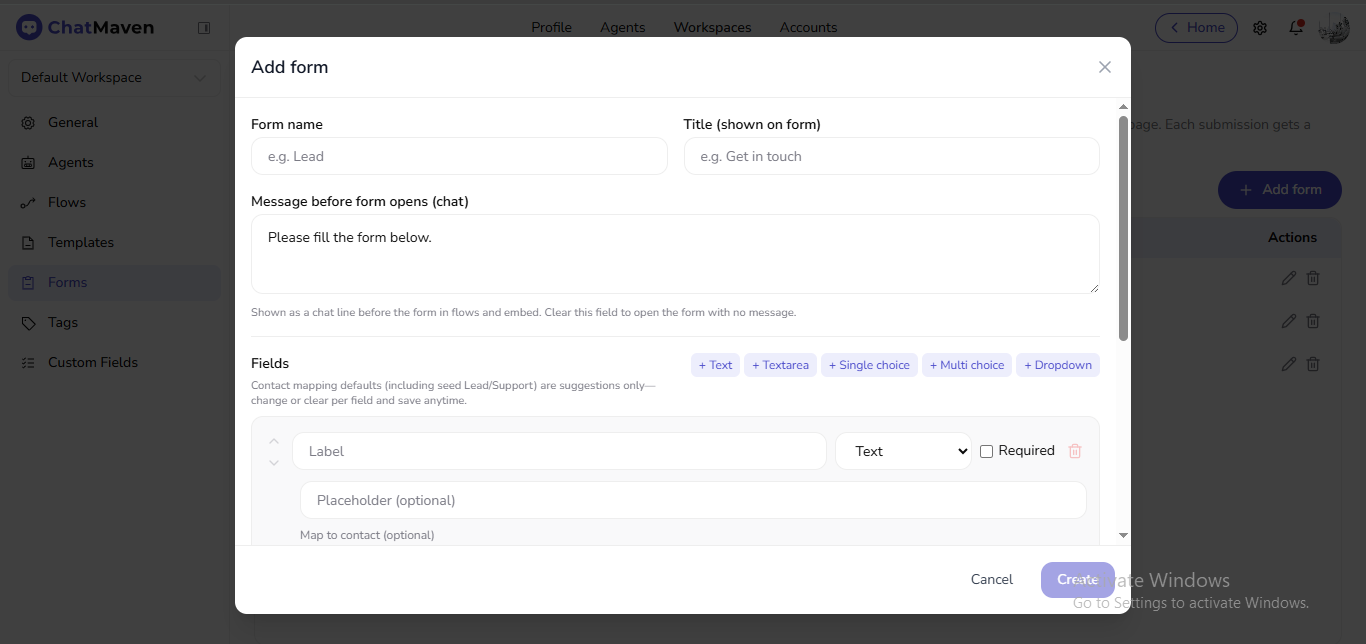
- In Add form, set:
- Form name (internal, e.g. Lead)
- Title (shown on form) (visitor-facing)
- Message before form opens (chat) — shown as a chat line before the form in flows and embed. Clear this field to open the form with no message.
- Under Fields, add + Text, + Paragraph, + Email, + Phone, + Number, + Single choice, + Multi choice, or + File upload. For each field, set the label, type, Required, Placeholder (optional), and Map to contact (optional) (default — Don't map —). Reorder or remove fields as needed.
- Optionally set Submit button text, Submit button color (hex), Thank-you header, and Thank-you body.
- Click Create; Cancel closes without saving.
Edit a form
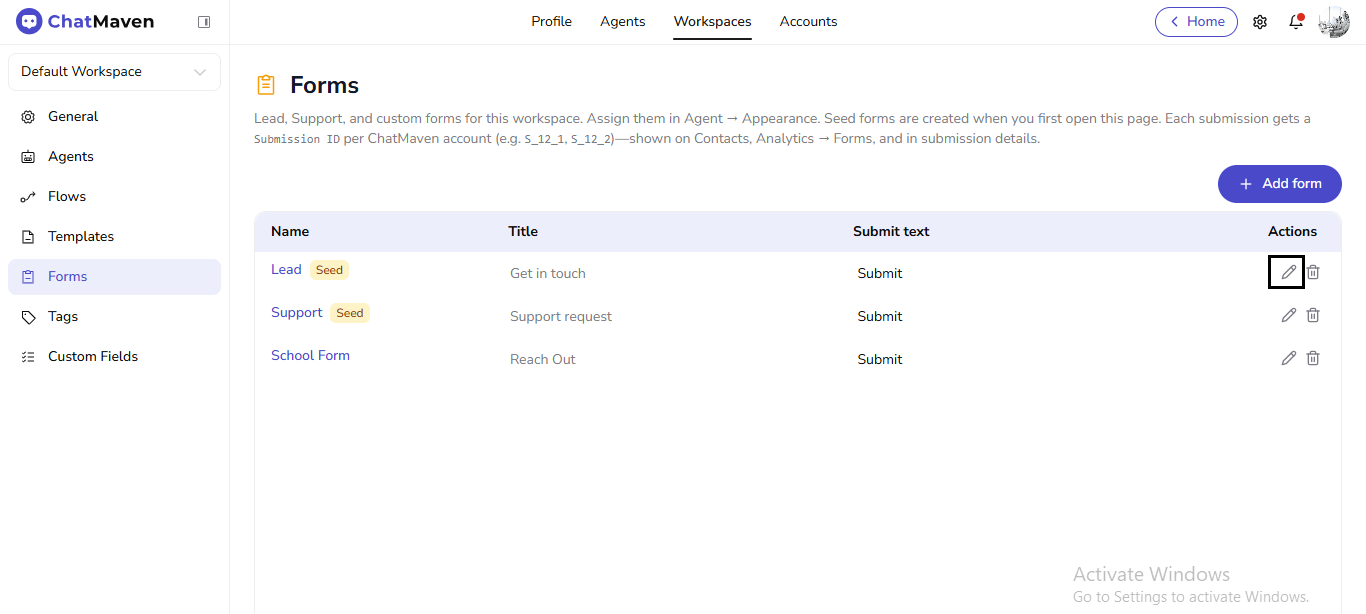
- In the table Actions, click Edit form (pencil) for the form.
- In Edit form, change names, title, chat message, fields, submit button, and thank-you copy the same way as creation.
- Click Update to save or Cancel to discard.
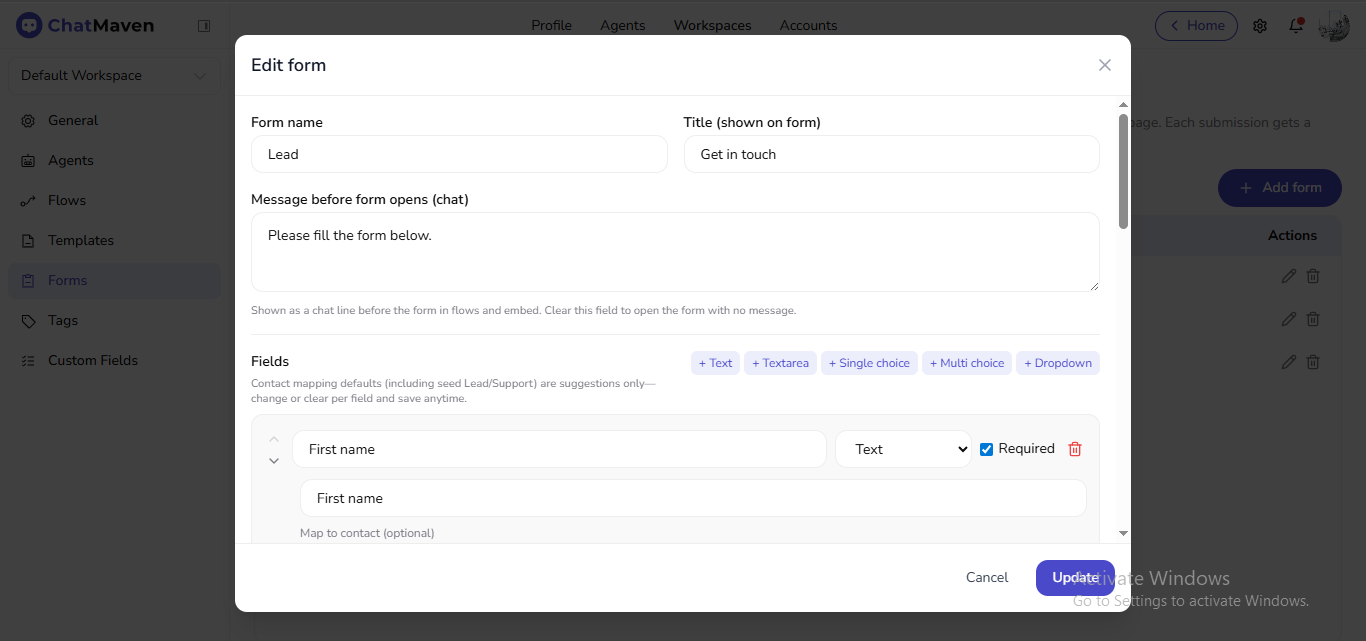
Duplicate a form
In Actions, click Duplicate form to copy an existing form (including seed rows). The new form appears in the table so you can edit it independently.
Delete a form
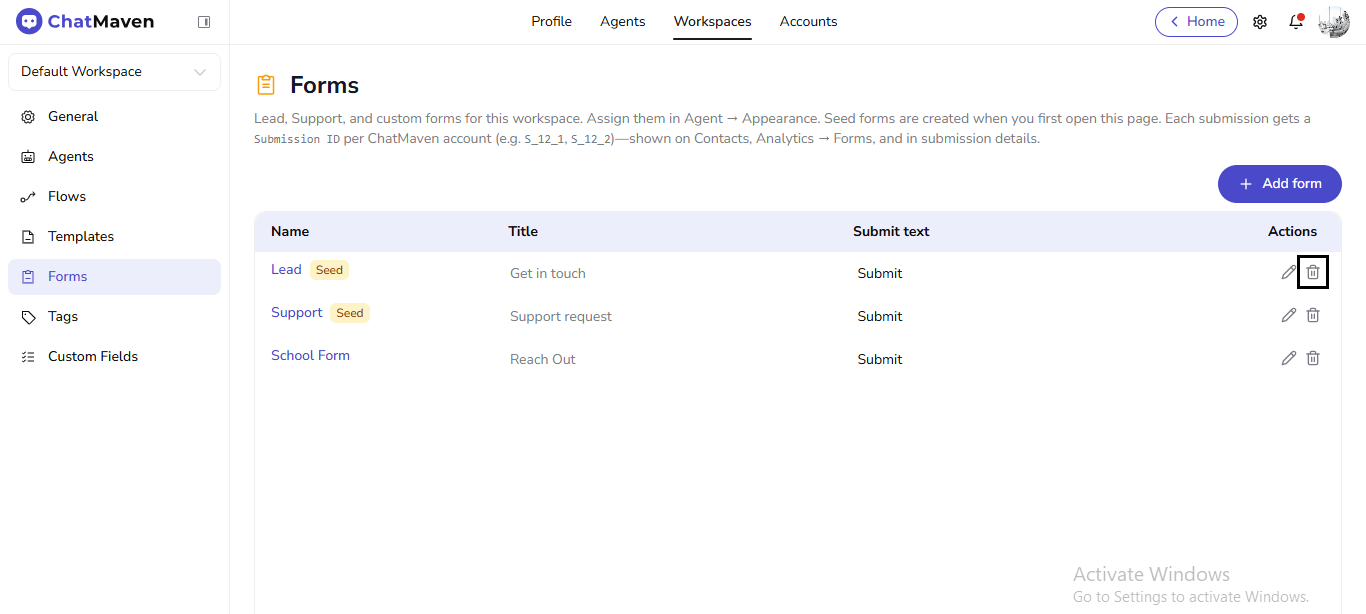
Seed forms show Edit form and Duplicate form only. Custom forms also show Delete form (trash).
- In Actions, click Delete form.
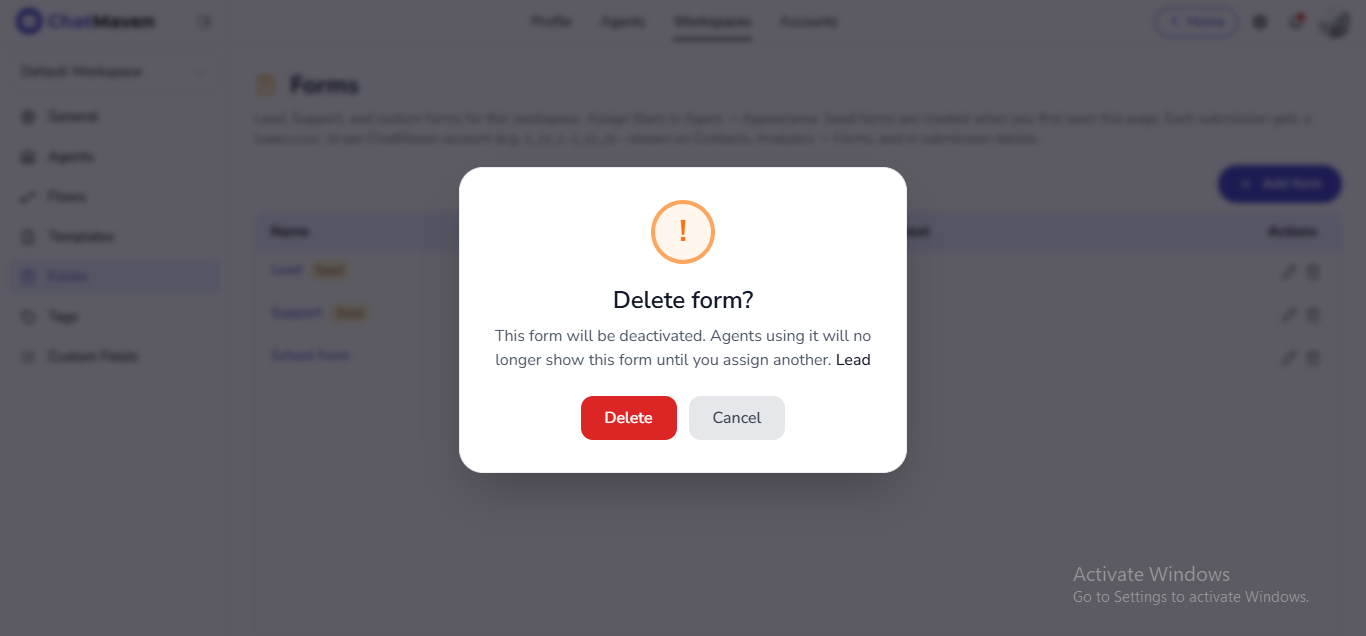
- In Delete form?, the dialog states: This form will be deactivated. Agents using it will no longer show this form until you assign another. Confirm Delete or Cancel.
Use Cases: Where You Can Trigger a CM Form
After you create a form, you can show it to contacts in four places. The images below walk through each setup.
| Where you trigger the form | Channels |
|---|---|
| Appearance → Agent Settings → Forms | Web Chat only |
| AI Action | Web Chat, WhatsApp, Instagram, and other channels you select on the action |
| ChatMaven Flow | Web Chat, WhatsApp, Instagram, and other channels selected on the flow |
| Inbox | Web Chat, WhatsApp, Instagram, and other channels for the open conversation |
Build or edit the form under Workspaces → Forms, then attach it in the settings below.
1. Enable a form on Web Chat
Show a form on the website widget when a visitor opens chat or after they send a set number of messages. This Appearance setting applies to Web Chat only. To send the same form on WhatsApp, Instagram, or other channels, use an AI Action, a ChatMaven Flow, or Inbox.
Channels: Web Chat only.
- Open Agents, pick the agent, then SPOTLIGHT → Web Chat → Appearance.
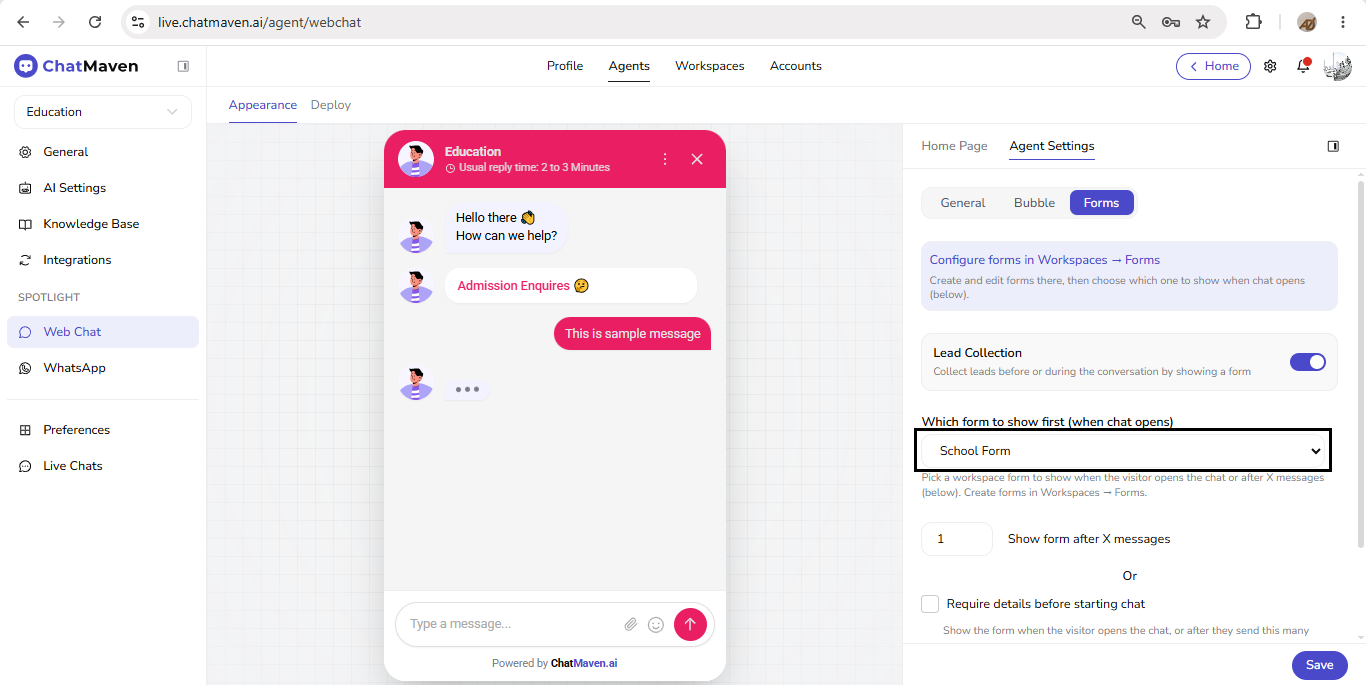
- In the right panel, click Agent Settings (not Home Page), then the Forms tab.
- The info box states: Configure forms in Workspaces → Forms. Create and edit forms there, then choose which one to show when chat opens (below).
- Turn on Lead Collection (Collect leads before or during the conversation by showing a form).
- Under Which form to show first (when chat opens), pick a workspace form.
- Choose when it appears: set Show form after X messages, or check Require details before starting chat.
- Optionally check Create contact only when flow collects required fields.
- Click Save.
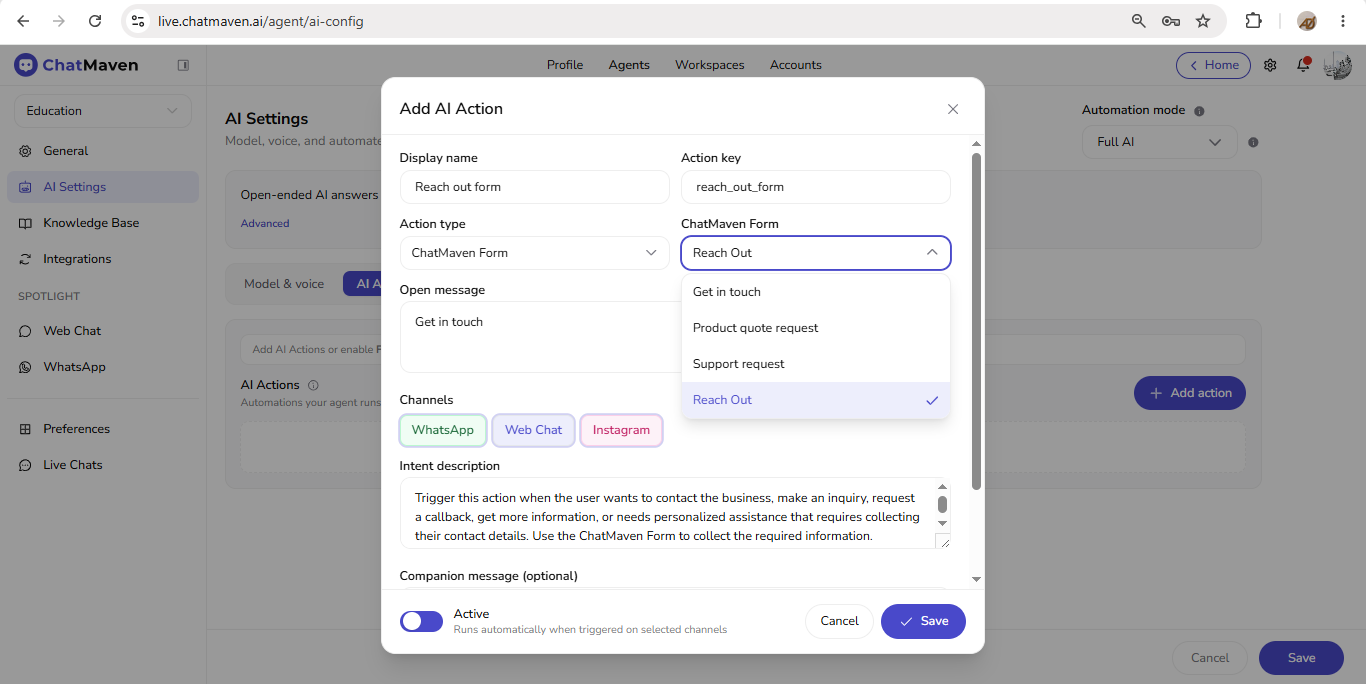
2. Trigger a form with an AI Action
Let the AI send a form when the contact’s intent matches, on the channels you select—Web Chat, WhatsApp, Instagram, and other channels shown on the action.
Channels: Web Chat, WhatsApp, Instagram, and other channels you enable for the action.
- Open Agents, pick the agent, then AI Settings → AI Actions.
- Click Add action. The Add AI Action dialog opens.
- Set Display name and Action key.
- Set Action type to ChatMaven Form (other types include WhatsApp Template, WhatsApp Flow, ChatMaven Template, and ChatMaven Flow).
- Under ChatMaven Form, choose Select form and pick a workspace form.
- Enter an Open message.
- Under Channels, select Web Chat, WhatsApp, Instagram, and any other listed channels where the form should run.
- Fill in Intent description. Optionally add a Companion message (optional) (Leave empty for a silent direct trigger (flow/form/template only). If set, only this text is shown—not the AI reply.).
- Leave Active on (Runs automatically when triggered on selected channels.). Click Save in the dialog, then Save on the AI Settings page.
3. Trigger a form in a ChatMaven Flow
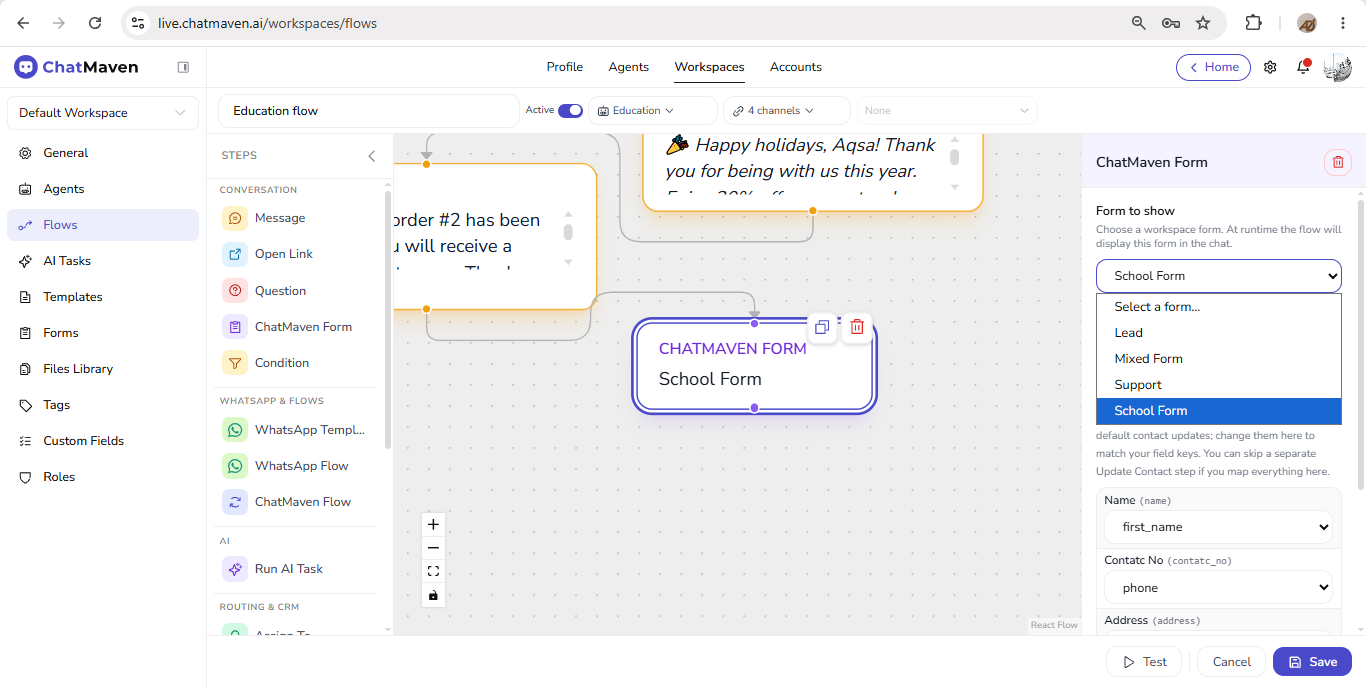
Send a form as a step in a visual flow. The form is delivered on Web Chat, WhatsApp, Instagram, and any other channels selected for that flow.
Channels: Web Chat, WhatsApp, Instagram, and other channels you check on the flow. No selection = all channels. Check one or more to restrict this flow.
- Open Workspaces → Flows. Click Add flow, or open an existing flow to edit.
- In the flow header, open the channels control and select Web Chat, WhatsApp, Instagram, and any other channels that should receive the form.
- From STEPS under Conversation, add ChatMaven Form (the palette may show an IG badge).
- Click the canvas node. In the ChatMaven Form panel:
- Form to show — pick a workspace form (Choose a workspace form. At runtime the flow will display this form in the chat.)
- Answers are saved as flow variables using each field’s key. Downstream steps such as Update Contact can reference the same keys.
- Map to contact (optional) — map each field to a contact attribute when the form is submitted. Common keys (for example email, phone, first/last name) are prefilled; change them to match your field keys. You can skip a separate Update Contact step if you map everything here.
- Step gap — delay before the next step.
- Click Save in the panel, then Save the flow. Turn the flow Active.
4. Send a form from Inbox
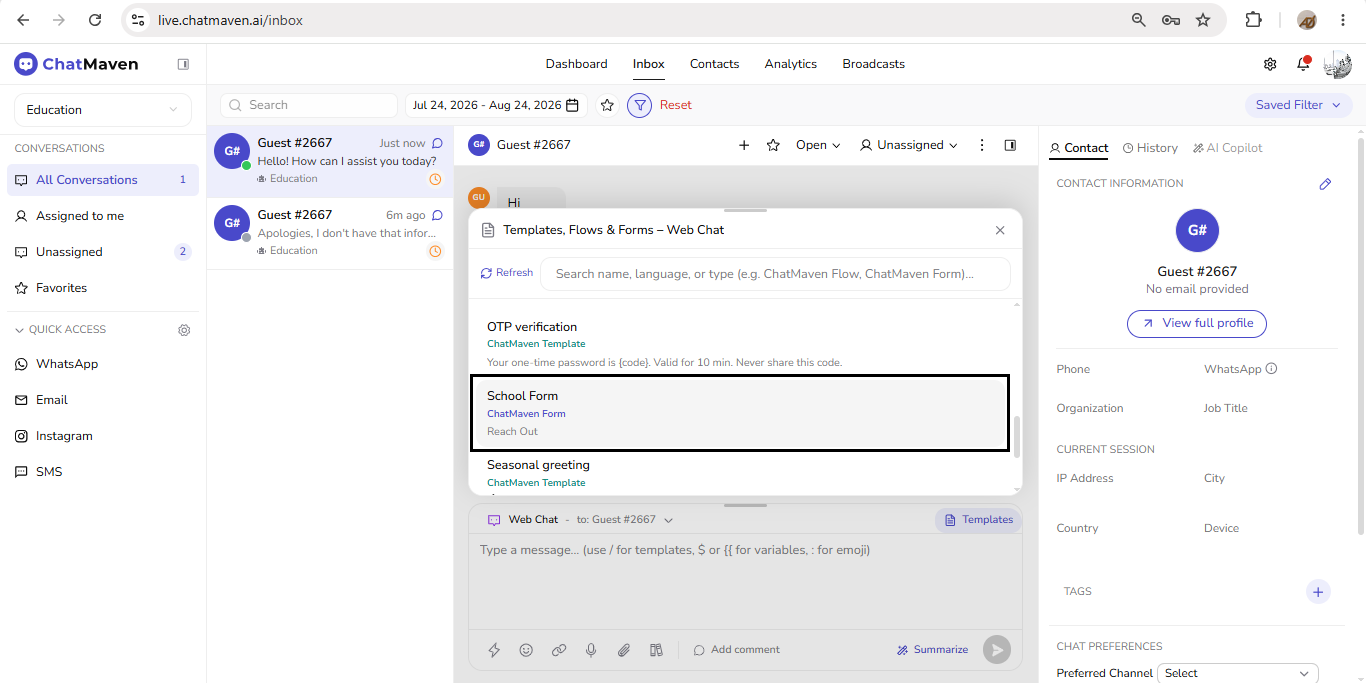
When a human agent is handling the conversation (instead of the AI), send a form from the composer. This works on Web Chat, WhatsApp, Instagram, and other channels for the open conversation.
Channels: Web Chat, WhatsApp, Instagram, and other channels available on that conversation. The picker title includes the current channel (for example Templates, Flows & Forms – Web Chat).
- Open Inbox and select a conversation on the channel you want to send on (Web Chat, WhatsApp, Instagram, or another connected channel).
- Confirm the composer channel selector at the top of the reply box.
- Click Templates. You can also type / in the box (placeholder: use / for templates, $ or {{ for variables, : for emoji).
- The panel Templates, Flows & Forms – followed by the channel name opens. Search with Search name, language, or type (e.g. ChatMaven Flow, ChatMaven Form)…
- Select a row whose type is ChatMaven Form, then send it.
Related
- Web Chat — Connect forms on Appearance → Agent Settings → Forms.
- AI Settings — AI Actions with type ChatMaven Form.
- Flows overview — ChatMaven Form steps and flow variables.
- Managing conversations — Composer Templates picker.